Nenw
Well-Known Member
sorry @JohnK, I’ve had a bunch on my plate but managed to dig into this today.
First thing you want to do it to pull the switch from the center console and from its own mounting plate. This requires removing two screws from behind. Easy enough.
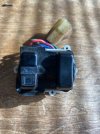
Next you want to pull up the side of the rubber cover to reveal a pin. Get something small enough in there too push it out enough to get a handle on. It should pull out relatively easy.
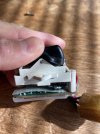
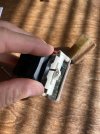
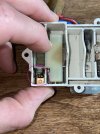
With the Pin removed you will be able to separate the switches from the actual mechanism with the electronics. This is where the work begins.
First, be careful when opening the box as there are spring loaded parts that provide the return to the switches. They aren't pre-loaded, so the won't come shooting out but they may separate.
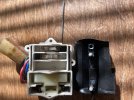
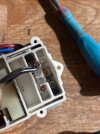
Next you will remove the two toggles below the passenger side switch.
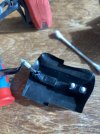
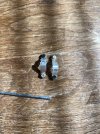
Notice how the connection points are blackened on both sides. You will definitely want to clean this up.
I think when I first pulled these apart, they were corroded. Not sure why with the limited amount of use these have seen are already burnt.
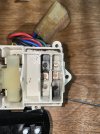
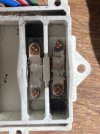
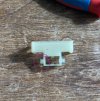
This ca be an optional step but it was worth it on my side. Pull the big white slider that actuates the driver window. To do this a needle nose or tweezer will work. Grab the edges and pull straight up.
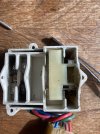
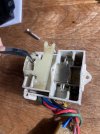
You can kind of see in this pic that one of the edges is a little deformed. Not really much I can do about that here, but it's good to know. This edge is what pushes the contacts together.
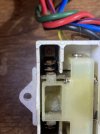
Here you can also kind of see how these contacts have carbon on them. Again, these were corroded the first time i opened these up. Some light sanding will clean those up. Be careful not the bend the connector out of position. Unfortunately easily done.
First thing you want to do it to pull the switch from the center console and from its own mounting plate. This requires removing two screws from behind. Easy enough.

Next you want to pull up the side of the rubber cover to reveal a pin. Get something small enough in there too push it out enough to get a handle on. It should pull out relatively easy.


With the Pin removed you will be able to separate the switches from the actual mechanism with the electronics. This is where the work begins.
First, be careful when opening the box as there are spring loaded parts that provide the return to the switches. They aren't pre-loaded, so the won't come shooting out but they may separate.

Next you will remove the two toggles below the passenger side switch.
Notice how the connection points are blackened on both sides. You will definitely want to clean this up.
I think when I first pulled these apart, they were corroded. Not sure why with the limited amount of use these have seen are already burnt.


This ca be an optional step but it was worth it on my side. Pull the big white slider that actuates the driver window. To do this a needle nose or tweezer will work. Grab the edges and pull straight up.


You can kind of see in this pic that one of the edges is a little deformed. Not really much I can do about that here, but it's good to know. This edge is what pushes the contacts together.

Here you can also kind of see how these contacts have carbon on them. Again, these were corroded the first time i opened these up. Some light sanding will clean those up. Be careful not the bend the connector out of position. Unfortunately easily done.


