Which model Lokka do you need?
Update: check out some more recent info on Lokka part numbers from @Nenw in this post here.
L300s came with two kinds of front differential: 2-pinion or 4-pinion. We used to think that 2-pinion was fitted until 1994, and 4-pinion after, but thanks to @brayden_23 we now know that that's not always true (Sorry!).
The 100% certain way to know which diff you have is to remove the front cover and have a look.
A less messy way is to look up the diff case part number in the parts catalog:
Go to Mitsubishi.epc-data.com and enter your frame number. Navigate to Front Axle -> Front Axle Differential and click on item 32216 CASE,FR DIFF. Now you know the part number of the diff case fitted to your Delica.
MB393001 = 2 pinion diff
MB393871 = 4 pinion diff
The final method is safest of all: let Lokka decide. When I ordered mine, Lokka customer service wanted a photo of my Delica's build plate (under the carpet flap below the drivers seat) so they could be sure to send out the correct unit.
Update: front lockers for both 2-pinion and later 4-pinion front diffs are available! Thanks to @iliketowalk for following up with Lokka. Here's what they said:
"The model number for Delica L300 4 pinion diff 7.25" Heavy Duty is MIT-FO-77 - that is 28 spline (but not the 8")
The model you have asked about is 2 pinion 25 spline is MIT-FO-110 (this is an existing model and fits a number of different Mitsubishi front diffs
For the L200 it lists at $349US"
Onwards, then, but first an important warning:
------------------
The position of the differential ring gear in relation to the pinion gear is critical. As long as you put everything back the way it came apart, all the shims and bearings in the same place, neither should change. However, if you're changing the bearings, or you forgot which shim goes where, you'll need to read and follow the workshop manual to re-setup your differential correctly. It's a good idea to read the workshop manual first anyway. It's an even better idea to measure your backlash and check your tooth contact pattern *before* disassembly, so you can confirm that it's been reassembled properly. I got excited and neglected to measure first, but I also have a spare front axle. YMMV.
------------------
I thoroughly recommend obtaining these parts first, but it's possible you could complete the job without replacing/using any/all of them:
(These are the part numbers to suit a 1991 L300 P25W SRPT1, use at your own risk):
Diff side gear shim kit MB185519
Cross pin MB241909
Driveshaft seals x2 MB290013
Diff side bearings MB092348
Cover gasket MB160579
Remove the front differential from the van. (Removing the front axle, the easier way.)
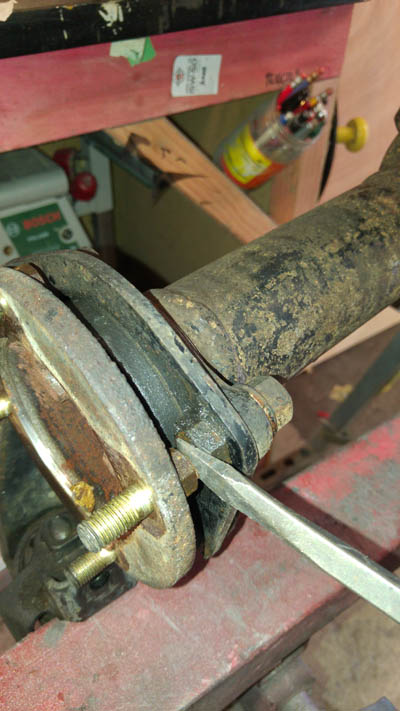
Take off the diff cover and extract the axle shaft. The workshop manual recommends a slide hammer, but you can also just lever here and tap it with a regular engineers hammer and it'll pop right out. Sometimes the circlip pops out of its groove and won't let you remove the axle- you can push the circlip back into place from inside the differential carrier.
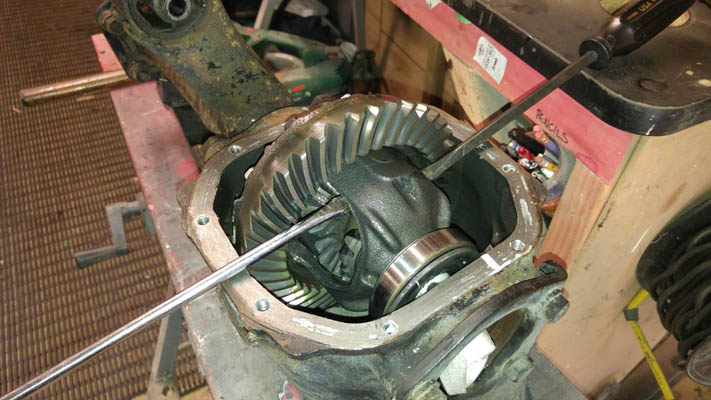
This is where you're supposed to measure the backlash and, if you're paranoid, check the tooth contact pattern. In theory it shouldn't change as long as you reassemble everything in the same place.
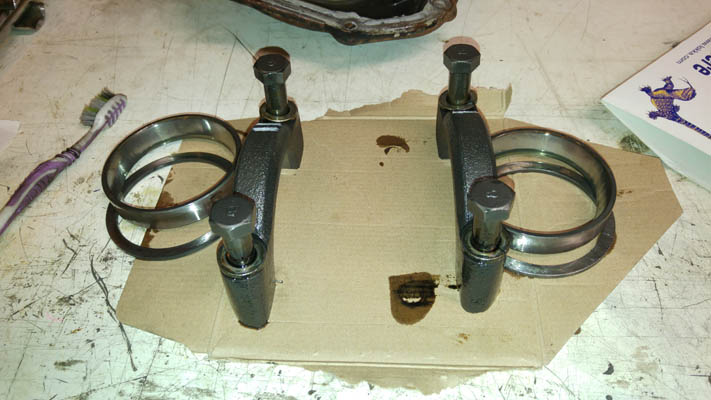
Mark the bearing caps so you can replace them in the same positions. Undo the bolts and remove the bearing caps, then lever the diff carrier out. **watch for the bearing races and shims- keep them on the side they came from so you can reassemble everything in the same place**
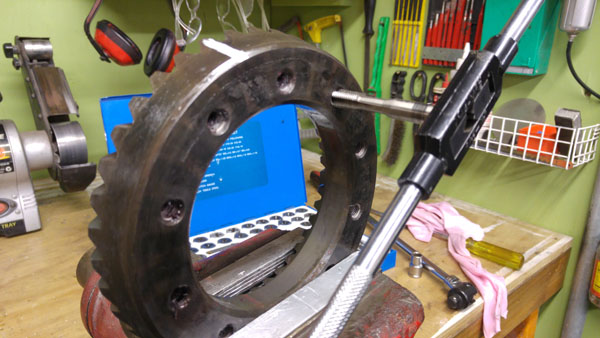
Mark the ring gear, then undo the bolts and remove the ring gear. **When reinstalling, you'll need to clean the threads with an M10 x 1.25 tap, and apply thread lock liquid- stud lock (the strongest) is what Mitsubishi specify.**

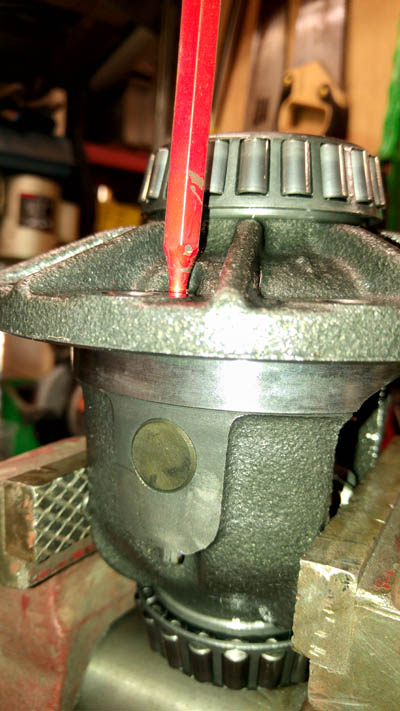
Using a drift (or a dead drill bit, if you're a bit dodgy), remove the lock pin (it only comes out one way) and the cross pin. (It's a good idea to use soft jaws to protect the diff carrier and vice, but I didn't because reasons.)
Rotate the side gears to remove them, then remove the axle gears. **keep the axle gear shims on their original sides**
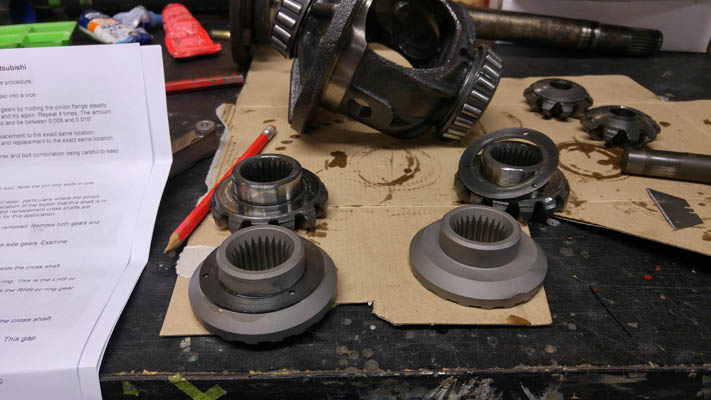
Now follow the instructions that came with your Lokka. On mine, they refer to the short axle gear going on the "long axle side, with no snap ring"- this may be confusing, as both the long axle and short axle/CVs have a snap ring: Lokka have confirmed that the short axle gear goes on the long axle, and that they were trying to imply that the snap ring is optional.
The spacers that came with my Lokka had a sharp edge on the inside that interfered with the radius edge on the axle gears, making it impossible to install the cross pin. I've told Lokka about this, and they say they're looking into it.
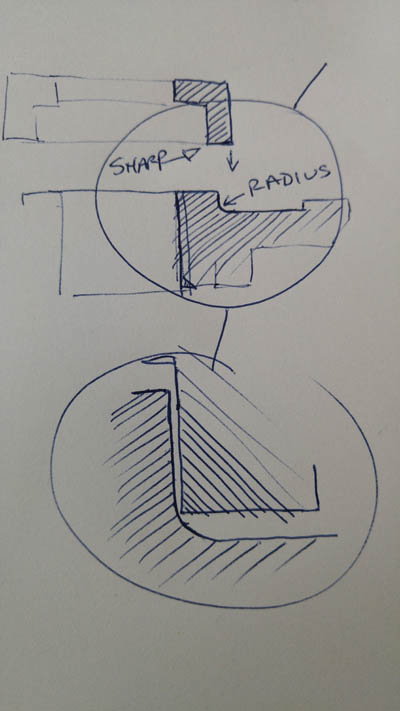
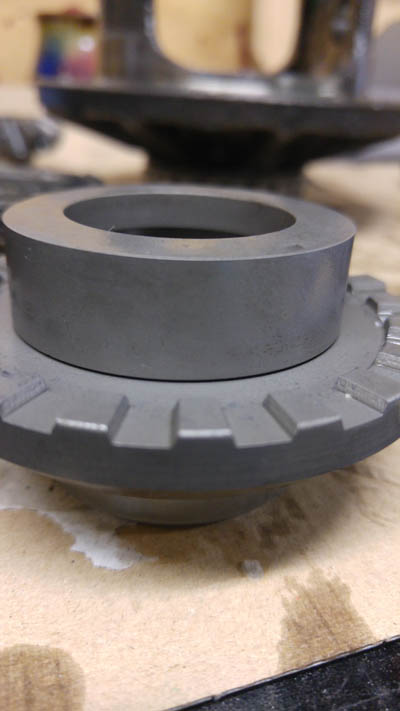
I ground off the sharp edge so the spacers would sit flat (a die grinder or Dremel will do), and it all went together properly.
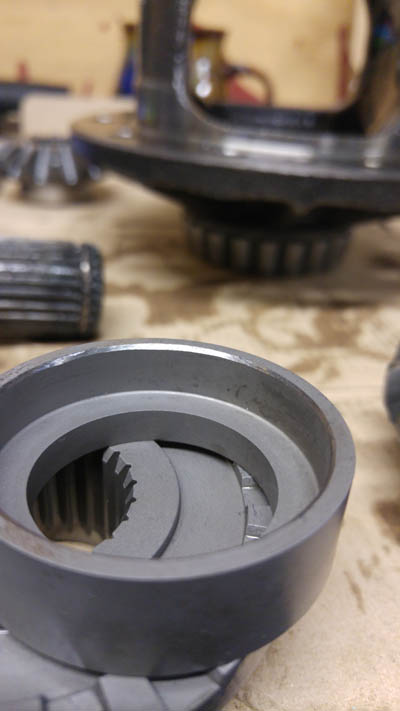
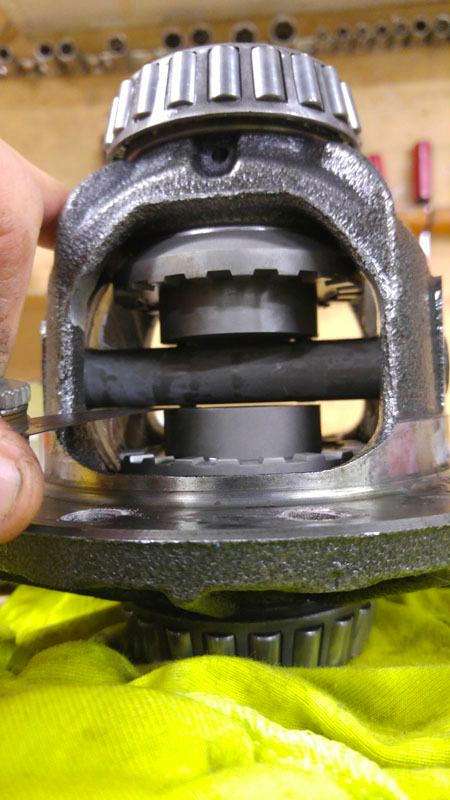
Install the side gears and spacers, then the cross shaft. Check the clearance between the cross shaft and the spacer- it should be 0.006 - 0.020", and ideally even on each side. Lokka say not to worry too much about these clearances, the important one is the inter-cam clearance which we measure later.
Getting this clearance right is where the shim kit comes in:
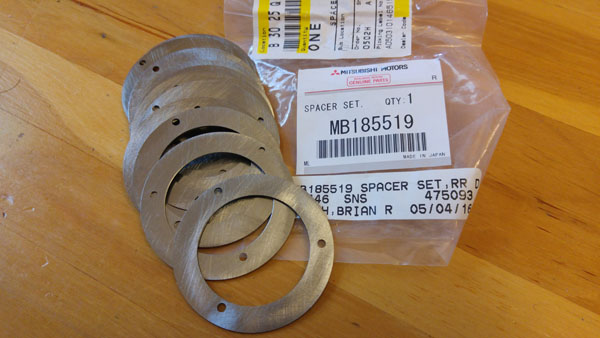
Part number MB185519. The shims in my kit are 0.80mm, 0.86, 0.90, 0.93, 1.00, 1.06, 1.10, 1.13, 1.16, 1.22, 1.27, 1.33. I had to use the two thinnest ones- I guess the kit is for bringing a worn differential back into spec, not fitting new guts to an old diff.
Once you've chosen your shims, remove the cross pin.
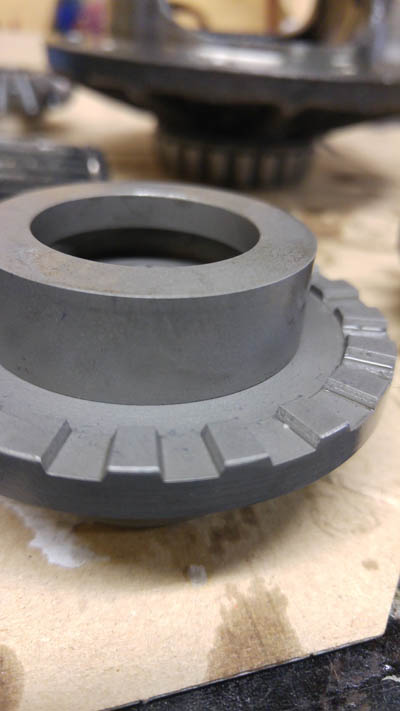
Install the pins into the open slots in the cam gears, with the nipple on the pin downwards. The nipple will sit inside the spring when we get to those.
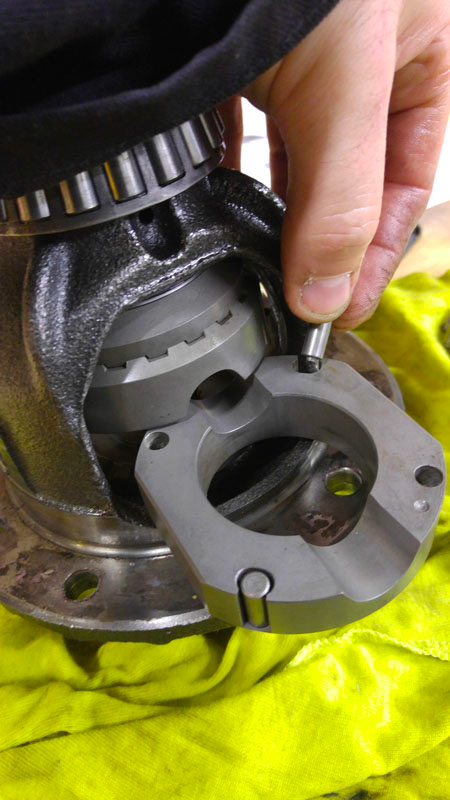
Install the cams into the diff cage. The upper one goes in first, then slide the second one in with the spacer inside.
You might have to grind a small amount from the diff carrier to be able to fit the cams.
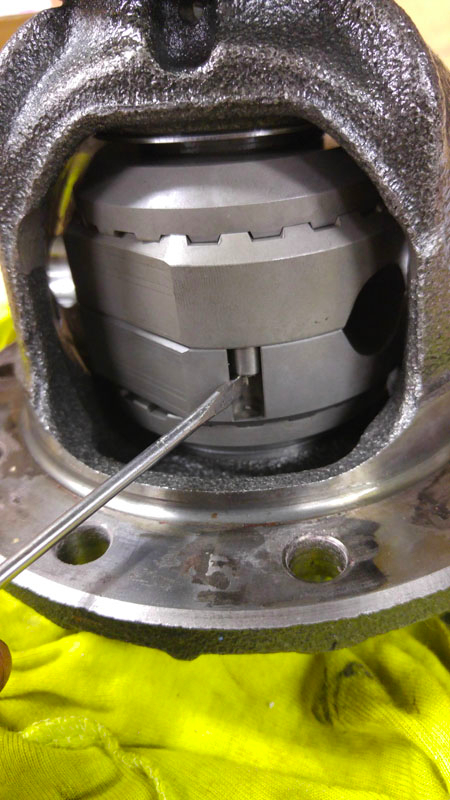
Align the cams, then push the pins across into the opposing hole.
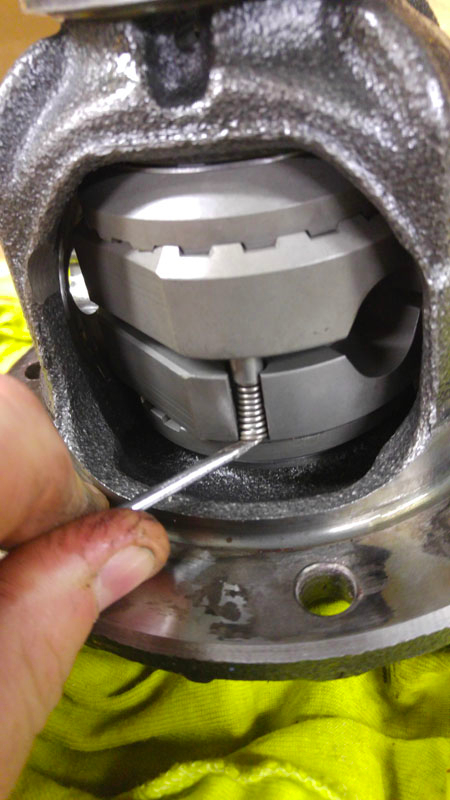
Wear safety glasses. Install the springs. Be glad you're wearing safety glasses as the last spring bounces off where your eyeball would be. Spend half an hour looking for the spring. Find it lodged in your beard. Install the last spring.
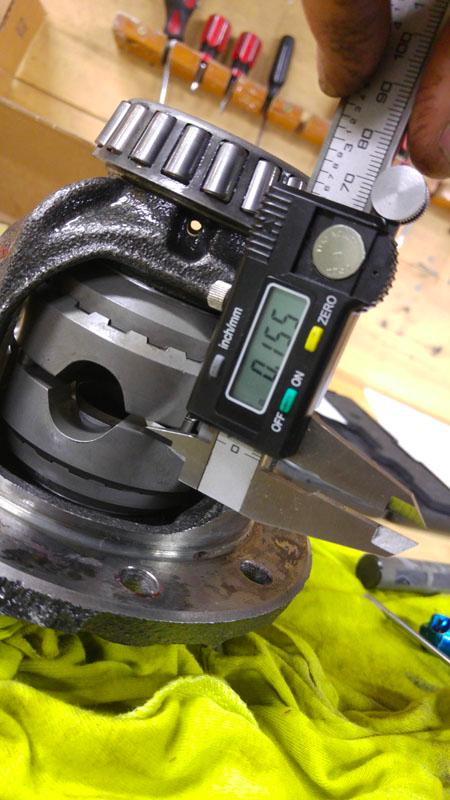
Push the cross shaft into place, and check the clearance between cams. It should be between 0.145 - 0.165". Nailed it.

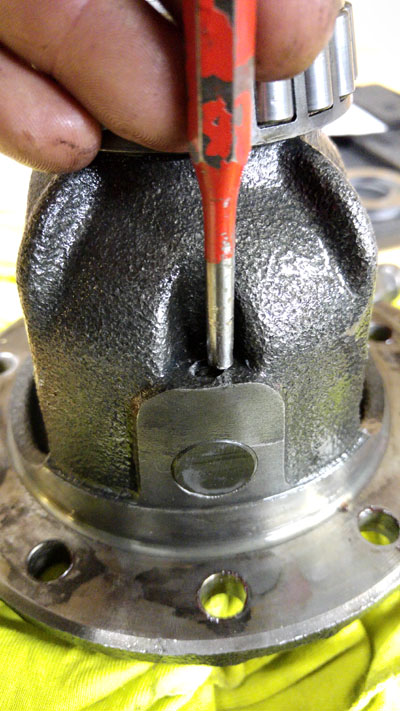
Install the locking pin and peen the edge of the hole so it can't come out
Clean up the ring gear bolt holes and bolts (M10x1.25 tap), and install with thread locking compound (usually red).
Reinstall the differential into the housing, making sure you put the spacers and bearing caps back the way they came out.
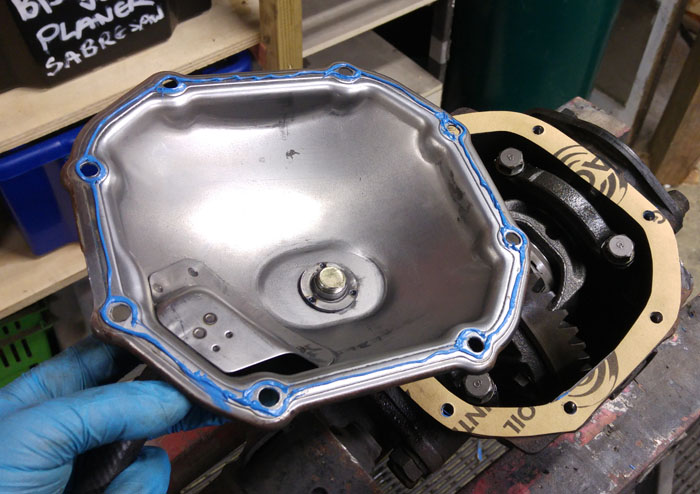
I've used a paper gasket and silicone, but in future I'd just use high-strength grey silicone and omit the gasket.
Reinstall and test the Lokka as detailed in the instructions. I had to turn the driveshaft manually to engage the auto hubs the first time (one had become locked during installation and needed to be reset), but once they were locked it clicked gently like it should.
Update: check out some more recent info on Lokka part numbers from @Nenw in this post here.
L300s came with two kinds of front differential: 2-pinion or 4-pinion. We used to think that 2-pinion was fitted until 1994, and 4-pinion after, but thanks to @brayden_23 we now know that that's not always true (Sorry!).
The 100% certain way to know which diff you have is to remove the front cover and have a look.
A less messy way is to look up the diff case part number in the parts catalog:
Go to Mitsubishi.epc-data.com and enter your frame number. Navigate to Front Axle -> Front Axle Differential and click on item 32216 CASE,FR DIFF. Now you know the part number of the diff case fitted to your Delica.
MB393001 = 2 pinion diff
MB393871 = 4 pinion diff
The final method is safest of all: let Lokka decide. When I ordered mine, Lokka customer service wanted a photo of my Delica's build plate (under the carpet flap below the drivers seat) so they could be sure to send out the correct unit.
Update: front lockers for both 2-pinion and later 4-pinion front diffs are available! Thanks to @iliketowalk for following up with Lokka. Here's what they said:
"The model number for Delica L300 4 pinion diff 7.25" Heavy Duty is MIT-FO-77 - that is 28 spline (but not the 8")
The model you have asked about is 2 pinion 25 spline is MIT-FO-110 (this is an existing model and fits a number of different Mitsubishi front diffs
For the L200 it lists at $349US"
Onwards, then, but first an important warning:
------------------
The position of the differential ring gear in relation to the pinion gear is critical. As long as you put everything back the way it came apart, all the shims and bearings in the same place, neither should change. However, if you're changing the bearings, or you forgot which shim goes where, you'll need to read and follow the workshop manual to re-setup your differential correctly. It's a good idea to read the workshop manual first anyway. It's an even better idea to measure your backlash and check your tooth contact pattern *before* disassembly, so you can confirm that it's been reassembled properly. I got excited and neglected to measure first, but I also have a spare front axle. YMMV.
------------------
I thoroughly recommend obtaining these parts first, but it's possible you could complete the job without replacing/using any/all of them:
(These are the part numbers to suit a 1991 L300 P25W SRPT1, use at your own risk):
Diff side gear shim kit MB185519
Cross pin MB241909
Driveshaft seals x2 MB290013
Diff side bearings MB092348
Cover gasket MB160579
Remove the front differential from the van. (Removing the front axle, the easier way.)
Take off the diff cover and extract the axle shaft. The workshop manual recommends a slide hammer, but you can also just lever here and tap it with a regular engineers hammer and it'll pop right out. Sometimes the circlip pops out of its groove and won't let you remove the axle- you can push the circlip back into place from inside the differential carrier.
This is where you're supposed to measure the backlash and, if you're paranoid, check the tooth contact pattern. In theory it shouldn't change as long as you reassemble everything in the same place.
Mark the bearing caps so you can replace them in the same positions. Undo the bolts and remove the bearing caps, then lever the diff carrier out. **watch for the bearing races and shims- keep them on the side they came from so you can reassemble everything in the same place**
Mark the ring gear, then undo the bolts and remove the ring gear. **When reinstalling, you'll need to clean the threads with an M10 x 1.25 tap, and apply thread lock liquid- stud lock (the strongest) is what Mitsubishi specify.**
Using a drift (or a dead drill bit, if you're a bit dodgy), remove the lock pin (it only comes out one way) and the cross pin. (It's a good idea to use soft jaws to protect the diff carrier and vice, but I didn't because reasons.)
Rotate the side gears to remove them, then remove the axle gears. **keep the axle gear shims on their original sides**
Now follow the instructions that came with your Lokka. On mine, they refer to the short axle gear going on the "long axle side, with no snap ring"- this may be confusing, as both the long axle and short axle/CVs have a snap ring: Lokka have confirmed that the short axle gear goes on the long axle, and that they were trying to imply that the snap ring is optional.
The spacers that came with my Lokka had a sharp edge on the inside that interfered with the radius edge on the axle gears, making it impossible to install the cross pin. I've told Lokka about this, and they say they're looking into it.
I ground off the sharp edge so the spacers would sit flat (a die grinder or Dremel will do), and it all went together properly.
Install the side gears and spacers, then the cross shaft. Check the clearance between the cross shaft and the spacer- it should be 0.006 - 0.020", and ideally even on each side. Lokka say not to worry too much about these clearances, the important one is the inter-cam clearance which we measure later.
Getting this clearance right is where the shim kit comes in:
Part number MB185519. The shims in my kit are 0.80mm, 0.86, 0.90, 0.93, 1.00, 1.06, 1.10, 1.13, 1.16, 1.22, 1.27, 1.33. I had to use the two thinnest ones- I guess the kit is for bringing a worn differential back into spec, not fitting new guts to an old diff.
Once you've chosen your shims, remove the cross pin.
Install the pins into the open slots in the cam gears, with the nipple on the pin downwards. The nipple will sit inside the spring when we get to those.
Install the cams into the diff cage. The upper one goes in first, then slide the second one in with the spacer inside.
You might have to grind a small amount from the diff carrier to be able to fit the cams.
Align the cams, then push the pins across into the opposing hole.
Wear safety glasses. Install the springs. Be glad you're wearing safety glasses as the last spring bounces off where your eyeball would be. Spend half an hour looking for the spring. Find it lodged in your beard. Install the last spring.
Push the cross shaft into place, and check the clearance between cams. It should be between 0.145 - 0.165". Nailed it.
Install the locking pin and peen the edge of the hole so it can't come out
Clean up the ring gear bolt holes and bolts (M10x1.25 tap), and install with thread locking compound (usually red).
Reinstall the differential into the housing, making sure you put the spacers and bearing caps back the way they came out.
I've used a paper gasket and silicone, but in future I'd just use high-strength grey silicone and omit the gasket.
Reinstall and test the Lokka as detailed in the instructions. I had to turn the driveshaft manually to engage the auto hubs the first time (one had become locked during installation and needed to be reset), but once they were locked it clicked gently like it should.
Last edited: