(Original document copied from Delicaclub.com)
When I went camping on the last week of October 2003 the overdrive switch stopped working, I taped the button down for the remainder of the trip as it had failed in the overdrive OFF position.
The overdrive button is easily removed with a small screwdriver, this exposes the switch as shown in figure 1.
The problem with the removal of the switch is that in the back of the gear change handle is a roll pin which has only one point of entry, figure shows how I had to break the top off the pin holder to remove it. In hindsight the inside end of the roll pin retainer could be cut off to expose the pin and then pushed out from the inside to out.
Once the roll pin is out the switch is free to move, but the wiring has been fed up a groove in the back of the gear stick and you will need to gain access to the top of the steering column (refer figure 5) to ease the wiring up as you pull on the switch.
Once the switch is off to one side there is a cur clip to remove in the top of the handle, but the handle was also bonded to the shaft (I don’t think this was designed to be disassembled), I had to twist the handle to break the bond on the shaft. On removal of the handle it was noticed that there is no room for this twisting of the handle as it breaks the wiring as shown in figure 4. If the wiring can be moved the handle can remain bonded to the gear stick, just be very careful with pulling on the wiring, as it will break under too much stress.
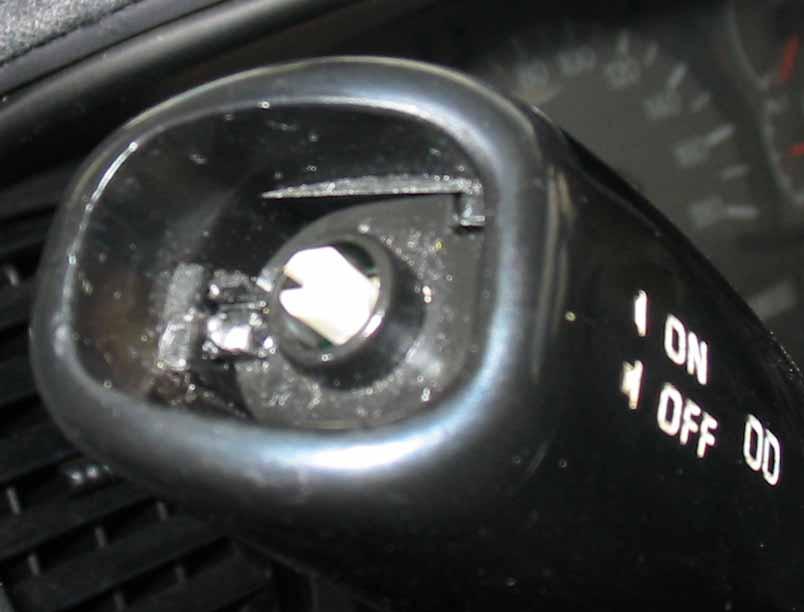


Figure 1 Button removed from gearshift handle.
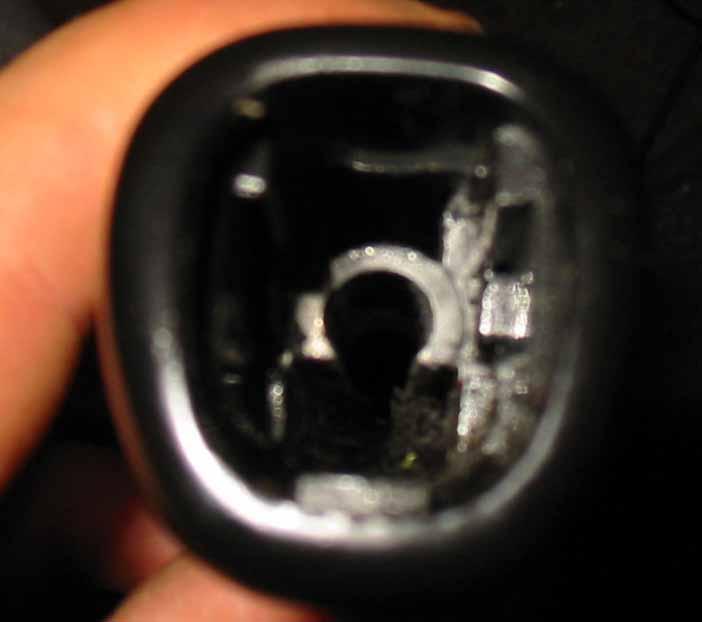


Figure 2 Inside removed handle. Figure 3 Broken switch
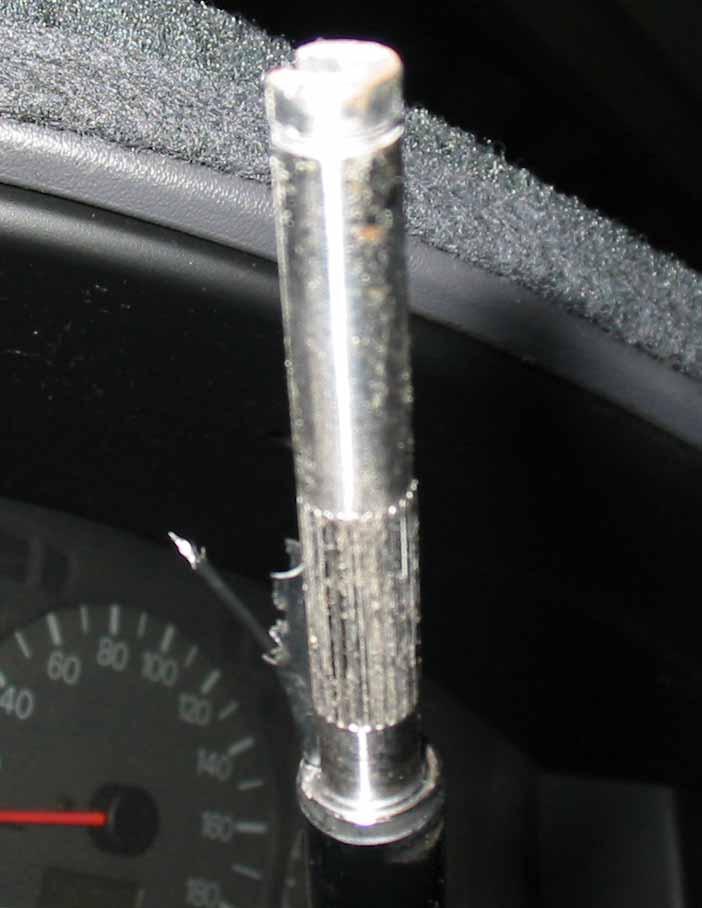


Figure 4 Gear change lever without handle Figure 5 Top of steering column
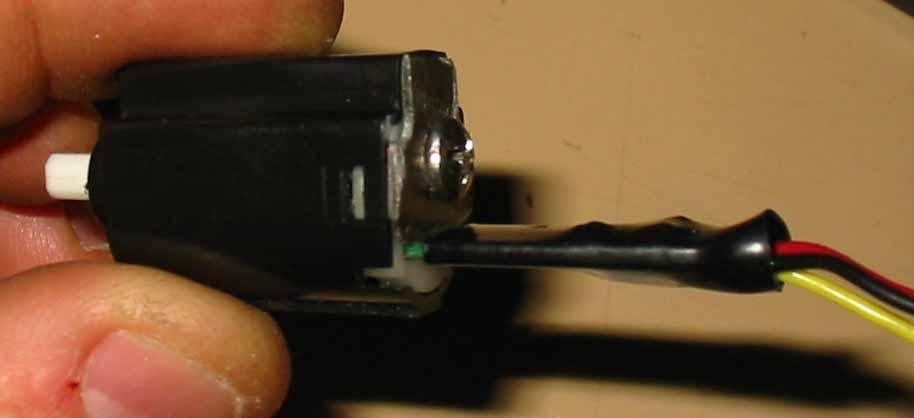
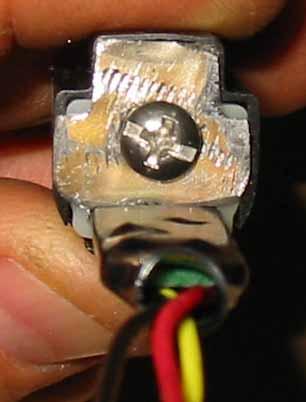

Figure 6 Side and end of switch fixed with metal plate and screw.

Figure 7 Switch fixed and wiring resoldered for reassembly.
I will properly replace the roll pin with a small countersunk screw to ensure the switch is retained well.
When I went camping on the last week of October 2003 the overdrive switch stopped working, I taped the button down for the remainder of the trip as it had failed in the overdrive OFF position.
The overdrive button is easily removed with a small screwdriver, this exposes the switch as shown in figure 1.
The problem with the removal of the switch is that in the back of the gear change handle is a roll pin which has only one point of entry, figure shows how I had to break the top off the pin holder to remove it. In hindsight the inside end of the roll pin retainer could be cut off to expose the pin and then pushed out from the inside to out.
Once the roll pin is out the switch is free to move, but the wiring has been fed up a groove in the back of the gear stick and you will need to gain access to the top of the steering column (refer figure 5) to ease the wiring up as you pull on the switch.
Once the switch is off to one side there is a cur clip to remove in the top of the handle, but the handle was also bonded to the shaft (I don’t think this was designed to be disassembled), I had to twist the handle to break the bond on the shaft. On removal of the handle it was noticed that there is no room for this twisting of the handle as it breaks the wiring as shown in figure 4. If the wiring can be moved the handle can remain bonded to the gear stick, just be very careful with pulling on the wiring, as it will break under too much stress.
Figure 1 Button removed from gearshift handle.
Figure 2 Inside removed handle. Figure 3 Broken switch
Figure 4 Gear change lever without handle Figure 5 Top of steering column
Figure 6 Side and end of switch fixed with metal plate and screw.
Figure 7 Switch fixed and wiring resoldered for reassembly.
I will properly replace the roll pin with a small countersunk screw to ensure the switch is retained well.