My steering has developed a mysterious clunk and a touch of vagueness (EDIT: see next post for a postmortem on my original steering rack). More importantly though, someone pointed out that the steering rack on my van was probably the only part I hadn't modified, rebuilt or replaced!* We can't have that. Here we go...
Rebuilding a power steering rack. According to the workshop manual it's not rocket surgery, as long as you have all the special tools. I don't have the special tools, but I reckon I can figure something out.
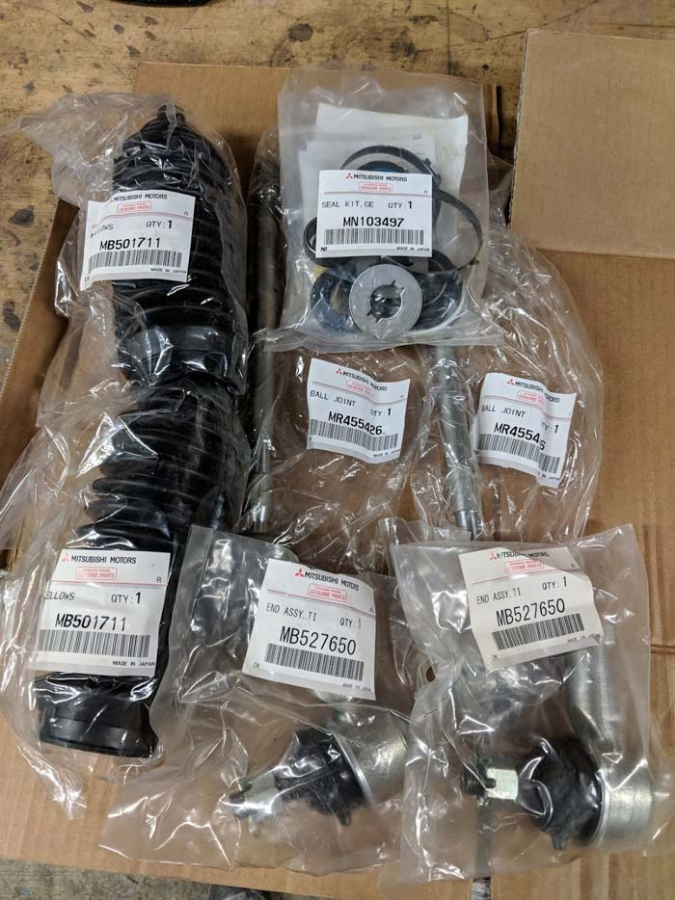
You will need:
MN103497 rebuild kit (contains 2 of the 3 bearings, all oil seals and O-rings, teflon seals, tie rod lock washers, gaiter retaining bands, new locking nut, Molybdenum rack grease)
One bearing size 37mmOD x 20mmID x9mm thick, without seals (not included in the rebuild it, for some reason).
MR455426 4WD tie rods x2
MB527650 tie rod ends x2
MB501711 gaiters/bellows x2
A steering rack suitable for rebuilding- no rust pitting on the rack, rack teeth shiny and un-worn.
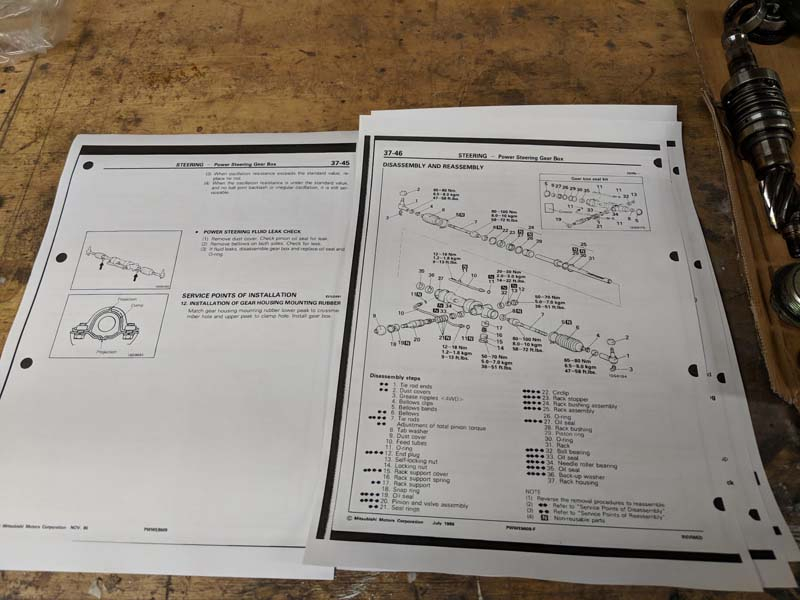
Workshop manual

I bought a steering rack from a 2WD L300 to rebuild, so the van wouldn't be out of action while I waited for parts etc. The 2WD rack (MB351502) is the same as the 4WD rack (MB351852), except for the tie rods; 4WD tie rods (MR455426) are longer. The MN103497 seal kit is only suitable for L300 steering racks, which suggests that no other vehicles use the same rack.
Remove and strip the steering rack as per the workshop manual. Clean everything thoroughly, except the pinion and valve assembly- just blow any fluid out with compressed air. You don't want solvent or dust getting in there. Check everything for wear, especially the rack where it passes through the seals- it should be clean and undamaged.
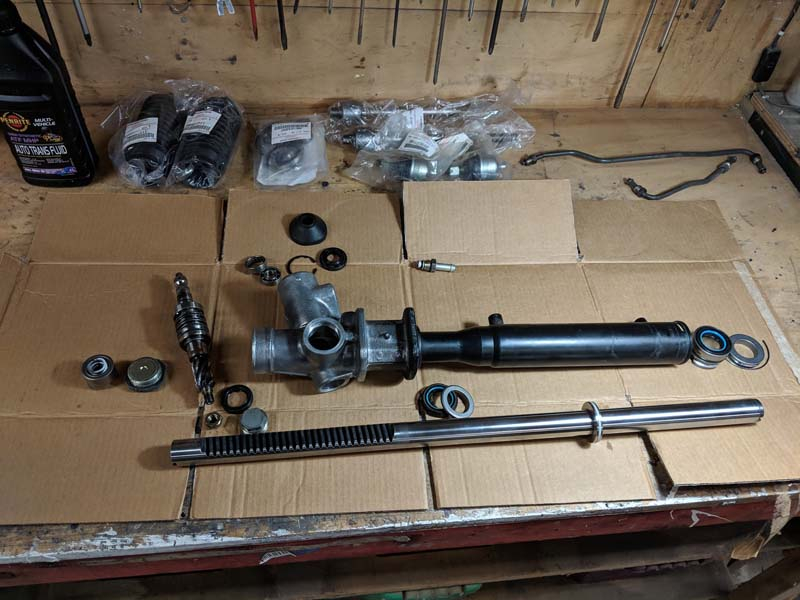
Remove the bearing from the pinion and valve assembly using a bearing puller.
Following the reassembly steps in the workshop manual:
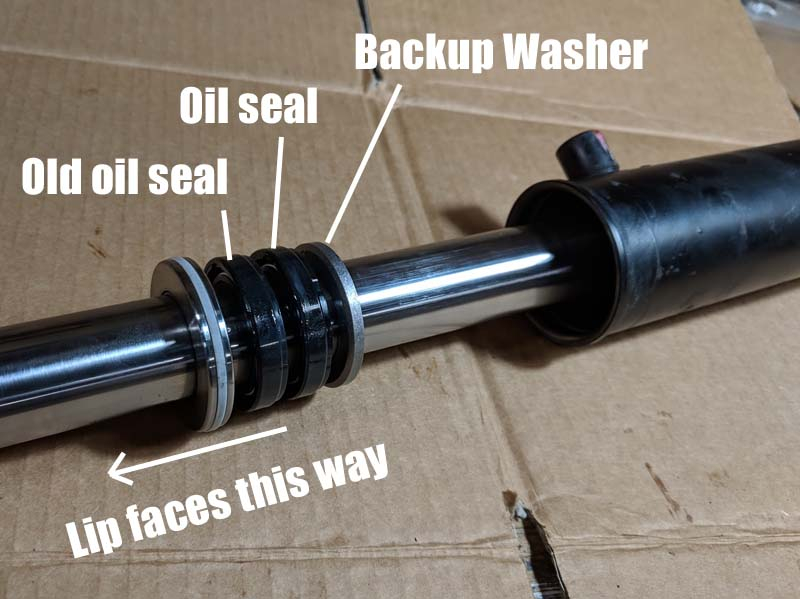
35: back up washer and oil seal. Use the rack as an installation tool. On the short (non-toothed) end of the rack place one of the old rack seals (we're using it as a spacer), the new rack seal (lubricate it with ATF and slide it onto the rack carefully, with the lip first) and the backup washer. Insert the rack into the housing, and press the seal into place. Before you remove the rack, give the housing a shake- if the backup washer rattles, you haven't pressed the seal in far enough.
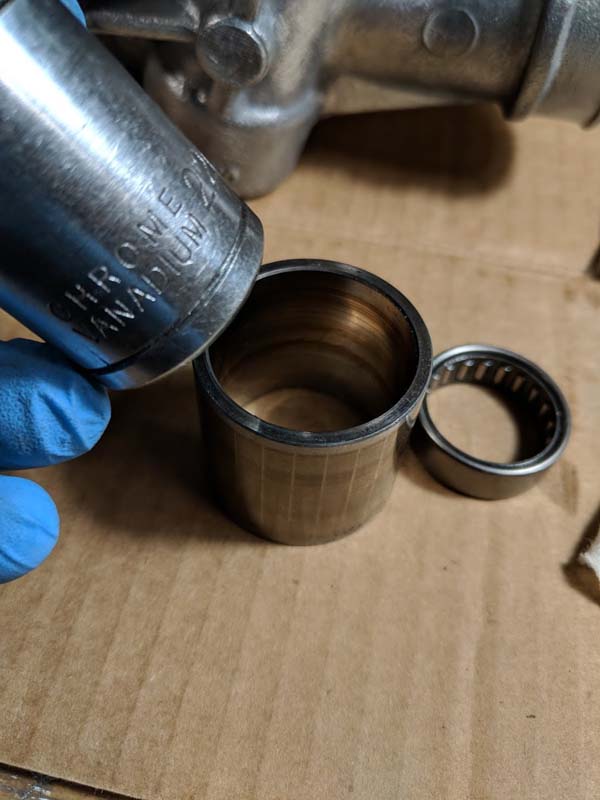
34: needle roller bearing. This one needs to be pressed in, not hammered in (hammering can bend the bearing race and pinch the rollers), it needs to go in dead straight, and you don't want to damage the bore the pinion and valve assembly goes into later. I used an old bearing sleeve as a guide, with a close-fitting socket to press on the bearing, and a G-clamp to do the actual pressing. You could also wrap a socket in tape until it was a snug fit in the bore.
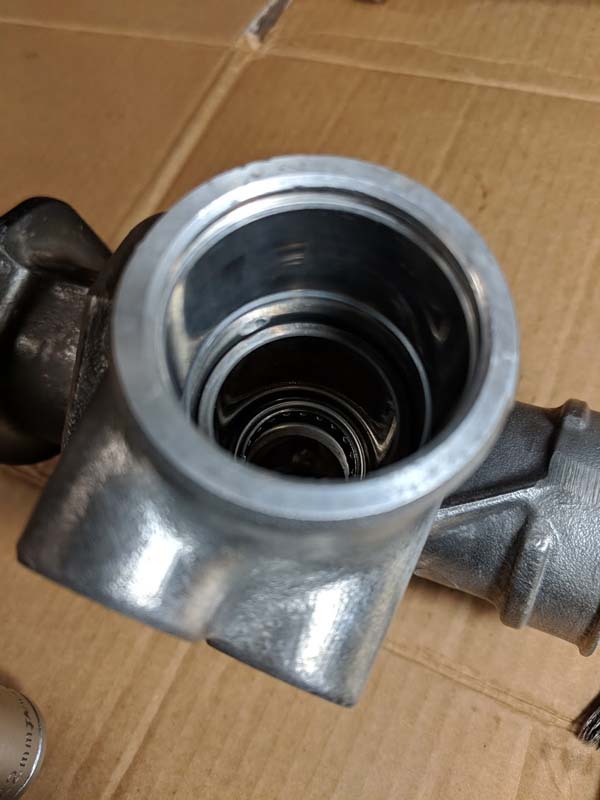
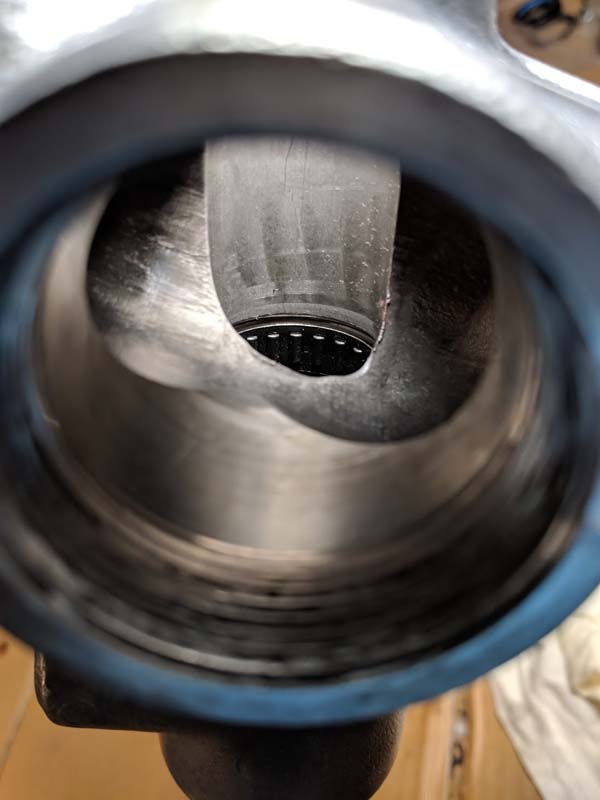
Check that the needle rollers are installed all the way.
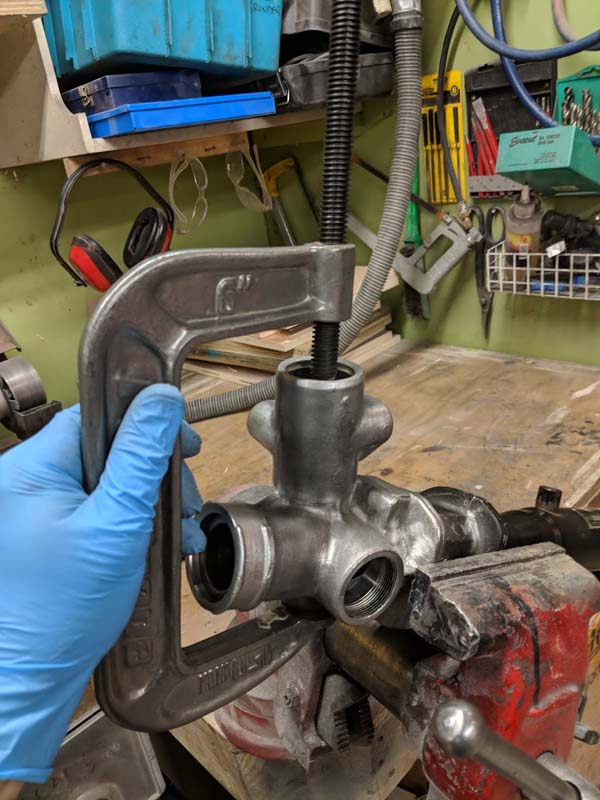
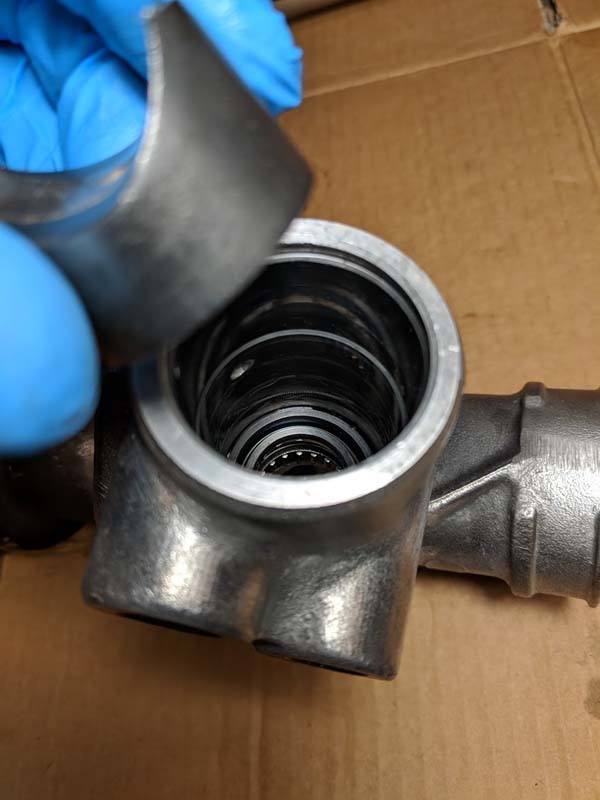
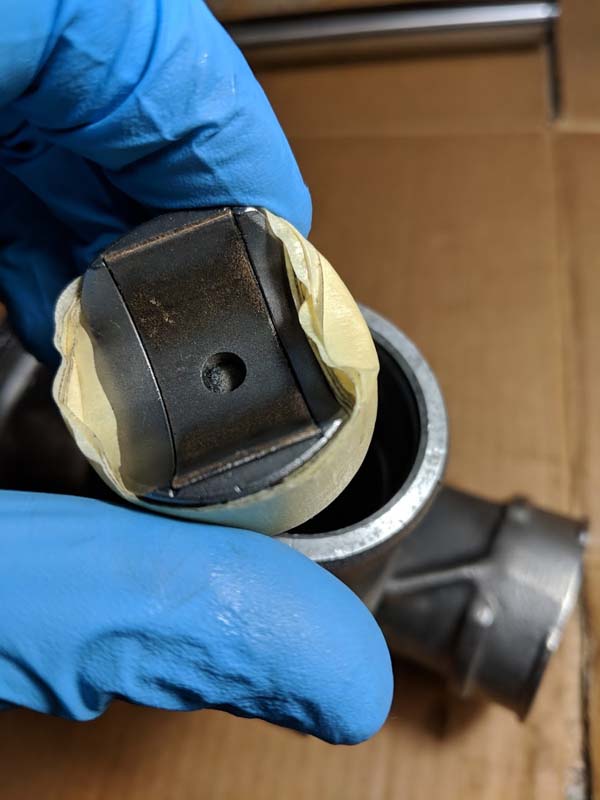
33: oil seal. The rack support is the perfect size to press the seal in, if you wrap it with tape to keep it centred and to stop it damaging the bore. The manual says "be sure the seal faces the correct direction”- the lip goes upwards, towards the pinion and valve assembly/away from the needle rollers.
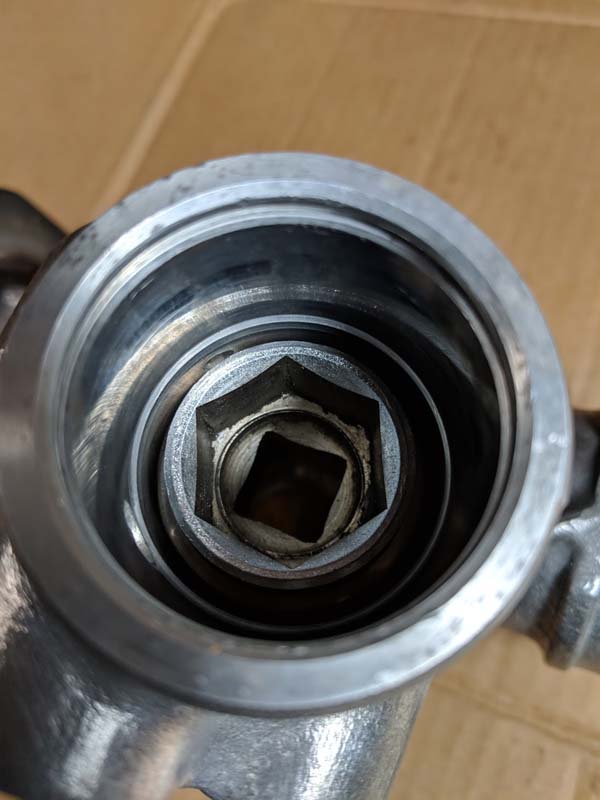
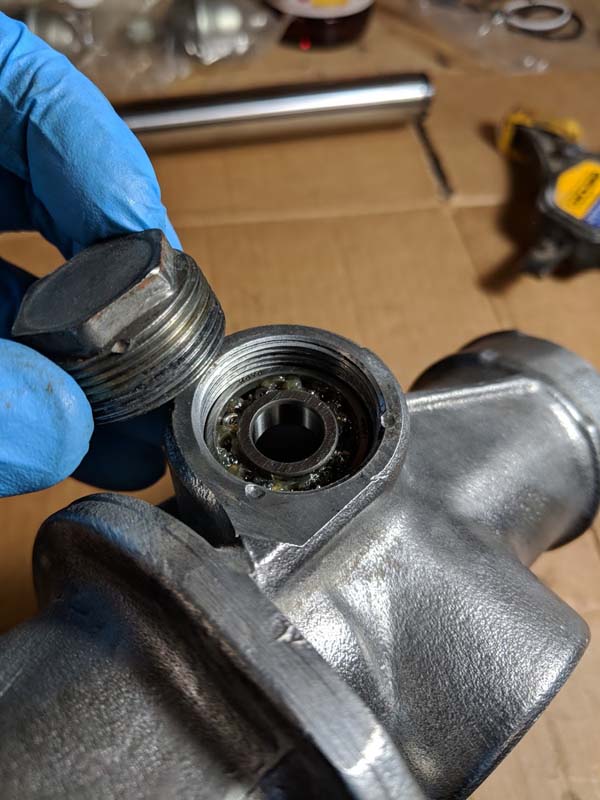
32: ball bearing. Get it started by hand, then install the cover plug to press it home.
-The rebuild kit comes with two O-rings that are nearly the same diameter. The thinner O-ring goes on the rack piston, the thicker one is for the end bushing/seal.
-Before installing the new piston O-ring and seal, polish the rack to help the end seals do their job.
25: installing rack in housing. Cover the teeth with a piece of PVC/electrical tape, leaving a flap of tape on the end (this will protect the new rack seal from being shredded by the teeth).
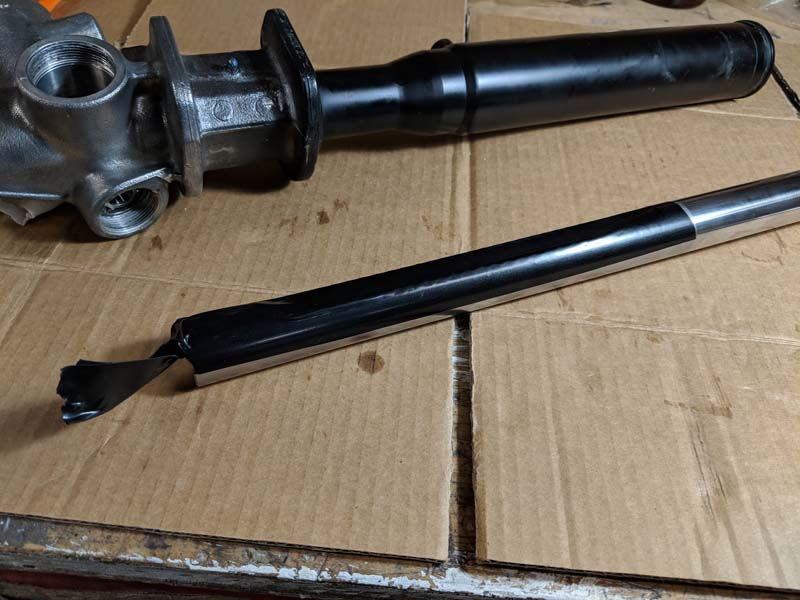
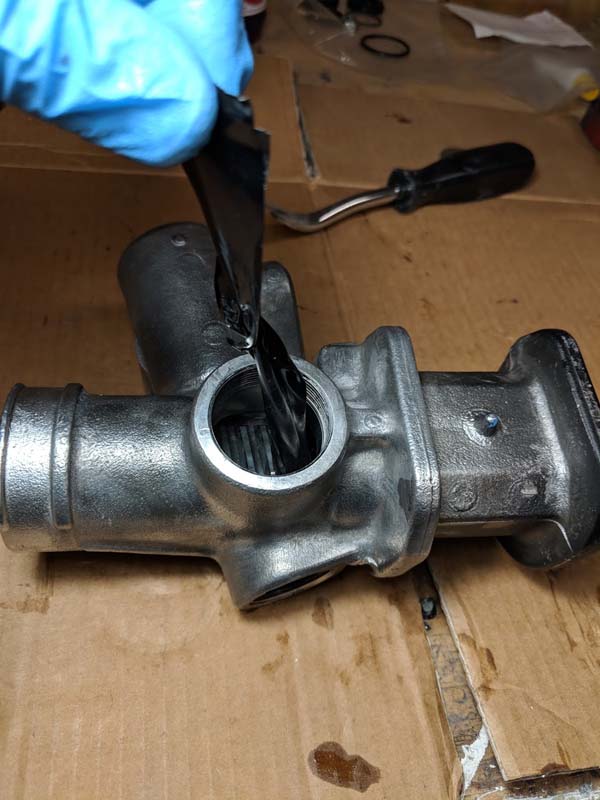
Lubricate the rack with ATF and install, threading the flap of tape through the inner seal. Catch the tape as it goes past the rack support hole, and peel it off as you install the rack.
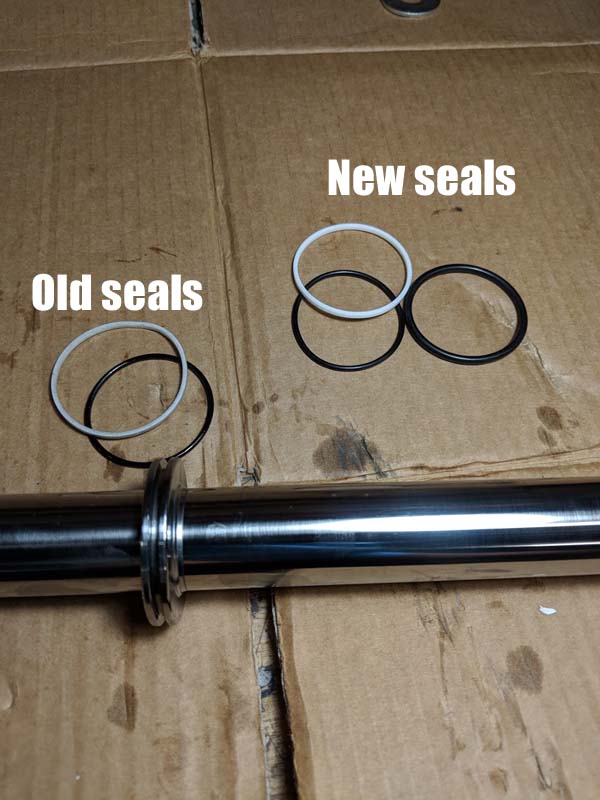
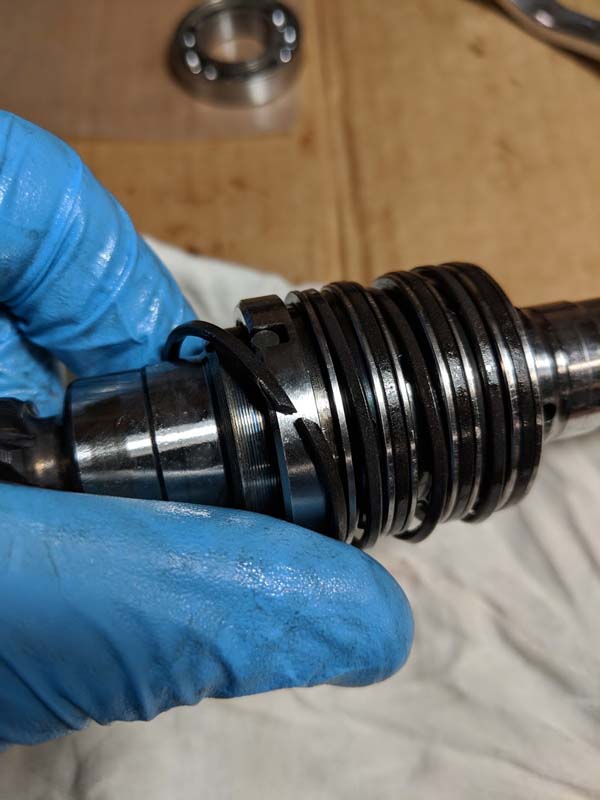
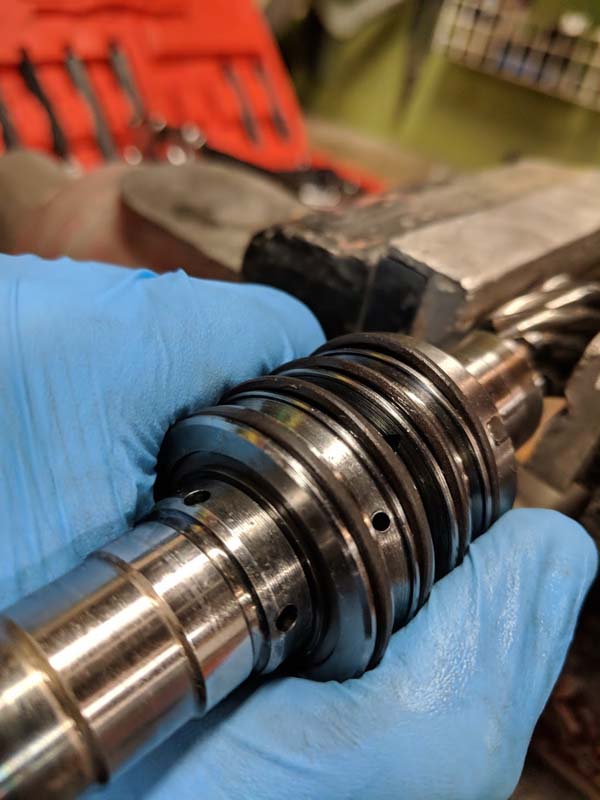
21: pinion and valve seals. Lubricate the new seals with ATF and slide them onto the valve from the splined end, so they end up in the recesses between your existing seals. (Keeping the old seals in place while you do this helps protect the new seals). Try not to stretch or twist the new rings- some stretching and twisting is inevitable, but try and keep it to a minimum.
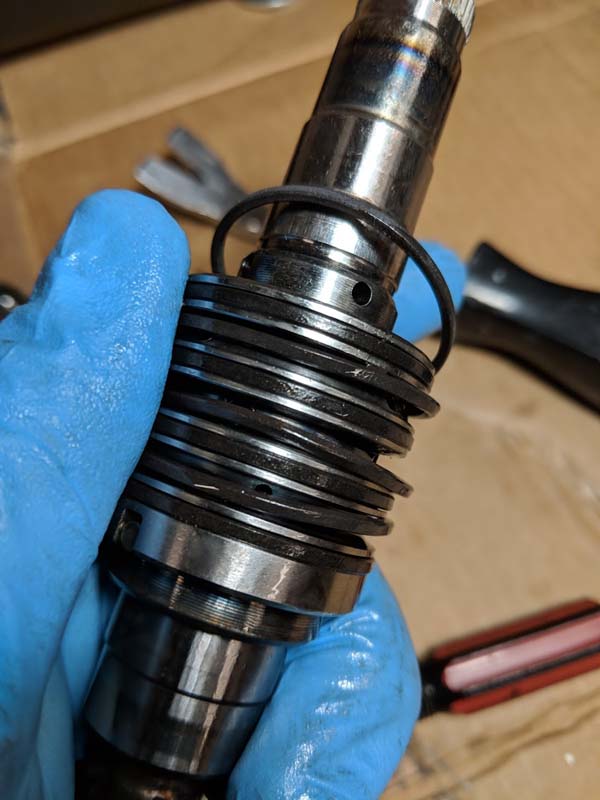
Carefully cut the old seals, taking care not to scratch or damage the seal body or the new seals, and slip the new seals into place.
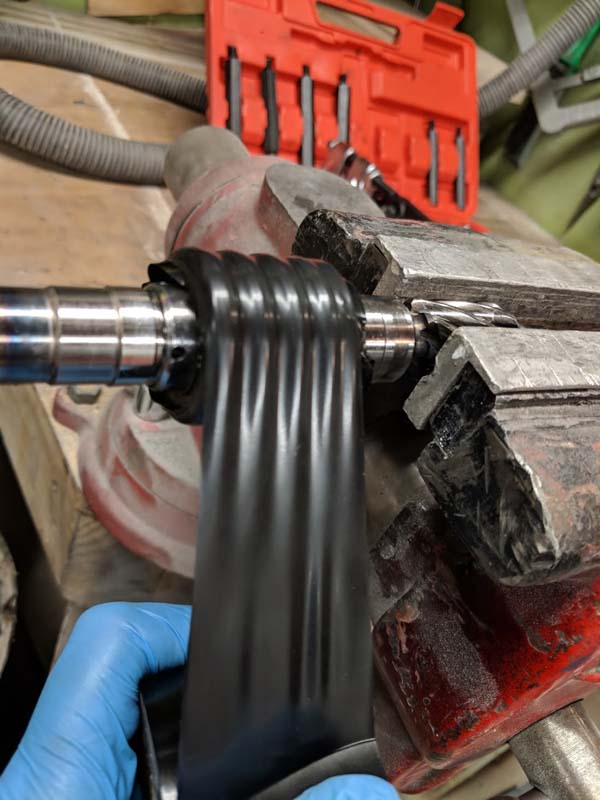
The new seals will have stretched, so to shrink them a little wrap the valve body very tightly in electrical tape, about 5-10 turns, stretching the tape as you go to build up the pressure.
Rebuilding a power steering rack. According to the workshop manual it's not rocket surgery, as long as you have all the special tools. I don't have the special tools, but I reckon I can figure something out.
You will need:
MN103497 rebuild kit (contains 2 of the 3 bearings, all oil seals and O-rings, teflon seals, tie rod lock washers, gaiter retaining bands, new locking nut, Molybdenum rack grease)
One bearing size 37mmOD x 20mmID x9mm thick, without seals (not included in the rebuild it, for some reason).
MR455426 4WD tie rods x2
MB527650 tie rod ends x2
MB501711 gaiters/bellows x2
A steering rack suitable for rebuilding- no rust pitting on the rack, rack teeth shiny and un-worn.
Workshop manual
I bought a steering rack from a 2WD L300 to rebuild, so the van wouldn't be out of action while I waited for parts etc. The 2WD rack (MB351502) is the same as the 4WD rack (MB351852), except for the tie rods; 4WD tie rods (MR455426) are longer. The MN103497 seal kit is only suitable for L300 steering racks, which suggests that no other vehicles use the same rack.
Remove and strip the steering rack as per the workshop manual. Clean everything thoroughly, except the pinion and valve assembly- just blow any fluid out with compressed air. You don't want solvent or dust getting in there. Check everything for wear, especially the rack where it passes through the seals- it should be clean and undamaged.
Remove the bearing from the pinion and valve assembly using a bearing puller.
Following the reassembly steps in the workshop manual:
35: back up washer and oil seal. Use the rack as an installation tool. On the short (non-toothed) end of the rack place one of the old rack seals (we're using it as a spacer), the new rack seal (lubricate it with ATF and slide it onto the rack carefully, with the lip first) and the backup washer. Insert the rack into the housing, and press the seal into place. Before you remove the rack, give the housing a shake- if the backup washer rattles, you haven't pressed the seal in far enough.
34: needle roller bearing. This one needs to be pressed in, not hammered in (hammering can bend the bearing race and pinch the rollers), it needs to go in dead straight, and you don't want to damage the bore the pinion and valve assembly goes into later. I used an old bearing sleeve as a guide, with a close-fitting socket to press on the bearing, and a G-clamp to do the actual pressing. You could also wrap a socket in tape until it was a snug fit in the bore.
Check that the needle rollers are installed all the way.
33: oil seal. The rack support is the perfect size to press the seal in, if you wrap it with tape to keep it centred and to stop it damaging the bore. The manual says "be sure the seal faces the correct direction”- the lip goes upwards, towards the pinion and valve assembly/away from the needle rollers.
32: ball bearing. Get it started by hand, then install the cover plug to press it home.
-The rebuild kit comes with two O-rings that are nearly the same diameter. The thinner O-ring goes on the rack piston, the thicker one is for the end bushing/seal.
-Before installing the new piston O-ring and seal, polish the rack to help the end seals do their job.
25: installing rack in housing. Cover the teeth with a piece of PVC/electrical tape, leaving a flap of tape on the end (this will protect the new rack seal from being shredded by the teeth).
Lubricate the rack with ATF and install, threading the flap of tape through the inner seal. Catch the tape as it goes past the rack support hole, and peel it off as you install the rack.
21: pinion and valve seals. Lubricate the new seals with ATF and slide them onto the valve from the splined end, so they end up in the recesses between your existing seals. (Keeping the old seals in place while you do this helps protect the new seals). Try not to stretch or twist the new rings- some stretching and twisting is inevitable, but try and keep it to a minimum.
Carefully cut the old seals, taking care not to scratch or damage the seal body or the new seals, and slip the new seals into place.
The new seals will have stretched, so to shrink them a little wrap the valve body very tightly in electrical tape, about 5-10 turns, stretching the tape as you go to build up the pressure.
Last edited:

")