PhilE
Active Member
I just installed remote locking on the Del. It took almost no time or $. This project works if you have central locking. That is, when you turn the key or lift the lock button on the driver’s door, the other doors follow. I spent some time poring over the wiring diagrams and I’m pretty sure you could wire into the existing system. Once I stuck my head under the dash and could barely reach the relay, I decided to go the brute force way instead. I installed an aftermarket remote actuator on the driver door button. When actuated with the fob, it lifts or lowers the button; and the rest of the locks follow. Here’s how I did it:
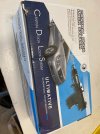
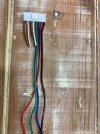
- Purchase a basic remote lock system with actuators, such as this one LINK. Mine cost less than $30 including shipping. They come in different boxes, but it would appear many come from the same factory. Probably all assembled by the same kid in Shenzgen.
- I found that the only wires that matter are 12v and ground, plus two leads for the actuator. I have no interest in triggering the horns or lights. If you can’t find a Delica in a parking lot, you are probably not qualified to complete this mod anyway.
- Hook up 12v and ground temporarily and verify on your unit that the two wires (green and blue in my case) will trigger an actuator. Then clip all the other wires.
- The instructions are exactly as you would expect at this price point. I was fortunate in that both of my fobs worked out of the box. I wish you the same, but you may need to pair them with the controller.
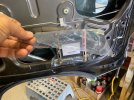
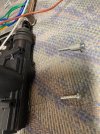
- Mount one of the actuators in the driver door. Put the window in the lowered position. You can follow the photo below for guidance. The actuator is mostly inside the door, but you can see the bellows just peeking up on the right side of the photo. Any of the actuators will work; I chose to use a 2 wire rather than the 4 wire master. This also means you will have 3 spares. Yay.
- You will need the actuator to sit at an angle leaning into the door cavity so as to not interfere with the handle rod. Photo shows the spacer and longer screw that I substituted at the upper mounting point to achieve this.
- Clip one of the actuator rods to length, put a compatible bend in it, and secure it to the existing lock rod with the included clamp.
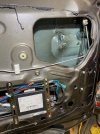
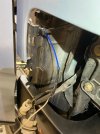
- Mount the controller in the door per the photo. There are pluses and minuses to this choice. Here it is less protected from water, weather, dust, vibration, etc. However I didn’t see any spot I liked near the steering wheel and I didn’t feel like running wire across the van. The other advantage is you will only need one 12v always-on wire into the door (vs. the two actuator wires, if you mount the controller inside the van). You can make your own choice on this, but as the unit is so cheap, I think it is a low-cost risk. In my case, I was prioritizing low effort and quick install.
- Run the window up and down a few times, to make sure all is clear.
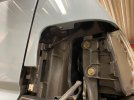
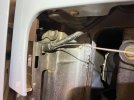
- The most difficult part of the install is getting a wire from the door to the fuse block (or other 12v source). However, it got much easier when I realized that by removing the corner light assembly (3 screws), you have pretty nice access to both relevant grommets (door side and body side) from outside the van. Use a wire, with a tight hook or loop bent in the end, as a fish from the outside to the inside of the door. Carefully cut an opening in the tape at the outside of the grommet/bellows assembly and pass the fish into the door cavity; then use the fish to pull your 12v wire out from the door cavity. Spray the wire with windex or dish soap to prevent binding.
- Put a small loop in the leading (other) end of the fish, as you may need this to grab the fish under the dash, using a second hooked fish. Now use an awl or small screwdriver to pierce a hole in the body grommet and push your fish through the pierced hole. This grommet is above the line of sight, so just go by feel. Use plenty of wire for your fish and it will ball up somewhere under the dash or take a happy turn and end up in the cab. Else you can get a hook or finger on it from under the dash and recover your power wire.
- Hook up to your power source of choice. I used an add-a-fuse for now, though plan to add a sub-block in the future for other projects/mods.
- Tidy up your wiring. Cut sections out of the controller wires to suit the proximity of the controller to the actuator. Secure the ground to a window regulator screw using a ring terminal and plug in the two actuator wires. secure the four wires in the existing wire loops. make sure none can be snagged as the window goes up and down.


