Copying a reddit post by @Sputnik for posterity:
After some research and surgery, this thread shows the disassembly and bulb solutions for several of the backlit displays and buttons on a '93 L300.
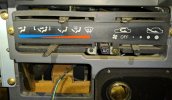
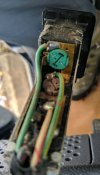
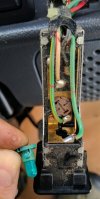
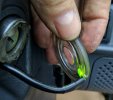
Initially I started to disassemble the heater controls box to get to the backlighting bulb, but soon realized disconnecting several cables and wiring harnesses was totally unnecessary because the translucent overlay can be peeled back from the left edge to access the bulb. The bulb can be pulled straight out and replaced with a needlenose pliers. The overlay then sticks back on easily.
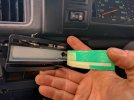
This bulb, the one that lights up the interior of the ashtray and most (all?) of the gauge cluster lights are replaceable with a Sylvania #2721 or #74 (or comprably sized LED cluster.)
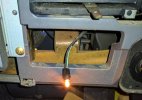
Prior to accessing the heater control back light, it's necessary to unscrew three screws under the plastic trim surrounding the controls and ashtray. and pull the 4 temp control arm tips. Doing so will expose the wire and fixture for the ashtray/coin storage light, which requires a 1/4 turn to extract the fixture and replace the bulb.
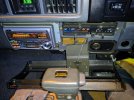
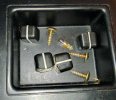
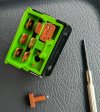
All switch bulbs are part of a removable assembly. Their electrical leads are 'woven' into the rubbery plastic bases, which then mount on to conductors inside the switch body. I was unable to source the base/bulb assembly, but after researching, realized it's pretty straightforward to extract the bulbs and reuse the bases. I went with a 10-pack of 7219 bulbs from Amazon for $7.. There are probably other bulbs and 3mm LEDs that could also do the job.
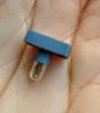
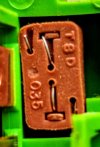
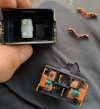
Each switch is internally different. Several contain small loose parts and springs, so disassemble with care and patience. Do one at a time. It takes 5-10 minutes to extract switch, replace bulb and reinsert switch.
Prying the trim around the switch will pop it loose. Be gentle so you don't crack or scratch anything. Each switch is attached to a short wiring harness. Reattaching can be tricky on a couple of them. It can help to pop out the adjacent button to reach in the hole to attach the shorter harnesses.
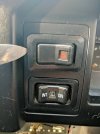
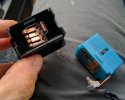
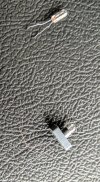
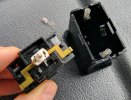
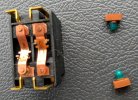
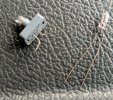
You can see the bulb and plastic base and how it mounts on prongs inside the switch. Slide the base off of the sturdy prongs. Once the base is off, use a tiny screwdriver to pry the bulb leads out on the underside of the base. The new bulbs have long leads that will need to be clipped once installed. Insert the new bulb into the base ensuring each little wire goes through a separate hole.
After some research and surgery, this thread shows the disassembly and bulb solutions for several of the backlit displays and buttons on a '93 L300.
- Defrost/AC/Temp controls

Initially I started to disassemble the heater controls box to get to the backlighting bulb, but soon realized disconnecting several cables and wiring harnesses was totally unnecessary because the translucent overlay can be peeled back from the left edge to access the bulb. The bulb can be pulled straight out and replaced with a needlenose pliers. The overlay then sticks back on easily.

This bulb, the one that lights up the interior of the ashtray and most (all?) of the gauge cluster lights are replaceable with a Sylvania #2721 or #74 (or comprably sized LED cluster.)

Prior to accessing the heater control back light, it's necessary to unscrew three screws under the plastic trim surrounding the controls and ashtray. and pull the 4 temp control arm tips. Doing so will expose the wire and fixture for the ashtray/coin storage light, which requires a 1/4 turn to extract the fixture and replace the bulb.


All switch bulbs are part of a removable assembly. Their electrical leads are 'woven' into the rubbery plastic bases, which then mount on to conductors inside the switch body. I was unable to source the base/bulb assembly, but after researching, realized it's pretty straightforward to extract the bulbs and reuse the bases. I went with a 10-pack of 7219 bulbs from Amazon for $7.. There are probably other bulbs and 3mm LEDs that could also do the job.


Each switch is internally different. Several contain small loose parts and springs, so disassemble with care and patience. Do one at a time. It takes 5-10 minutes to extract switch, replace bulb and reinsert switch.
Prying the trim around the switch will pop it loose. Be gentle so you don't crack or scratch anything. Each switch is attached to a short wiring harness. Reattaching can be tricky on a couple of them. It can help to pop out the adjacent button to reach in the hole to attach the shorter harnesses.

- Hazard Lights Switch

You can see the bulb and plastic base and how it mounts on prongs inside the switch. Slide the base off of the sturdy prongs. Once the base is off, use a tiny screwdriver to pry the bulb leads out on the underside of the base. The new bulbs have long leads that will need to be clipped once installed. Insert the new bulb into the base ensuring each little wire goes through a separate hole.


