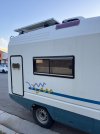
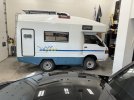
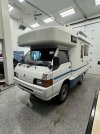
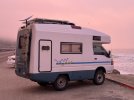
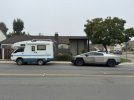
My Turtle Van the JB470

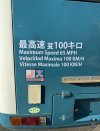
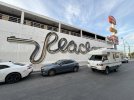
Finally got around to making this for the back. The cutter shifted the vinyl a little so it’s not perfect but, it gets the message across
IMG_7692.jpeg

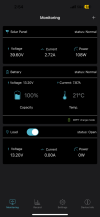
Also, here is my battery/ charge monitor running my ac at full blast, fridge is running, and computer plugged into the monitor. Seems like this all might work out.
IMG_7693.png
 
Ordered my starlink today. Have definitely seen a huge drop in the battery though with winter coming to utah.

Two notes there:
1. I will never run the ac in winter
2. I hope to never be anywhere with snow like utah while on the road, but I will be ready ;)
 
Alright so a few updates:

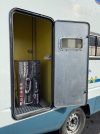
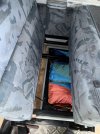
Some of you have wondered about the battery placement. Yes it's in the rear outer storage box, yes its not insulated. The fix, I put in a battery heat pad that barely fits under it. I ran the cable out the drain plug hole and also put a blanket around the battery. This helps with any stationary charging around or below 32 F. I don't have a whole lot i can do while it's moving other than maybe finding a pad that connects to the battery terminals and turns on / off at a certain heat. I believe this battery has an auto shut off anyway, but I am being extra careful.

This is the heat pad: https://www.amazon.com/dp/B08JGCNBLM?psc=1&ref=ppx_yo2ov_dt_b_product_details

My friend tinted the windshield (55%) and front side windows (35%) with xpel ceramic tint yesterday. Anything to help control temps, limit some of the outside viewing as well. I have tattoos, and I hate having to put on sunscreen to drive my car. I may have mentioned it already, but I also personally applied xpel ppf to the plastic windows a few weeks ago to help with pinstriping/ damage on trails. it barely distorts the view, and I cant imagine buffing/ polishing, or even replacing the windows, so I am taking care of the ones I've got.

IMG_8180 Large.jpeg
IMG_8179 Large.jpeg

I also picked up this Apex Badland winch from Harbor Freight (currently only $530 with a synthetic rope). Now before we jump into the Harbor Freight discussion, let's first look at the fact that I have literally spared no expense on any of the equipment/ changes to this system yet. I researched winches a lot before buying this and can find no bad reviews of this winch. The Warn winch it was made to replicate is about $2100. I also asked around a lot of the Utah 4x4 groups (yes we are the epicenter for 4x4 on earth) and there are tons of people using this winch successfully and often here in Utah, on Moab trails, and even Matt's Off Road Recovery uses this winch on a few if not all of their recovery vehicles.

IMG_8183 Large.jpeg

Here is a link to the:

Winch: https://www.harborfreight.com/12000-lb-winch-with-synthetic-rope-and-wireless-remote-56385.html
Heat Pad: https://www.amazon.com/dp/B08JGCNBLM?psc=1&ref=ppx_yo2ov_dt_b_product_details
 
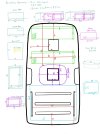
If anyone is looking to import and build a JB470, I thought you might like to use the rough dimensions I have been taking for mine. This is how I decided on which components to fit to the roof, what could fit in exterior storage, fridge, etc. These are not exact measurements, but as well as I could take using ladders around the vehicle:

Untitled_Artwork 10.jpg
 
Got the quadlock charger/ phone mount wired in yesterday. While I was under the dash I realized that my clutch master cylinder (pn: mb555191) has given up the ghost, so I need to order that now.
Screen Shot 2023-11-29 at 10.07.58 AM.png

Also, my starlink showed up today, so I will start that install this weekend most likely.

Screen Shot 2023-11-29 at 10.09.51 AM.png
 
Dude that's awesome! I follow summit auto lab on youtube. I'd love to be able to meet them someday, they seem so chill.
 
Dude that's awesome! I follow summit auto lab on youtube. I'd love to be able to meet them someday, they seem so chill.
They are both super great people! I’m sure they’d love to meet you!

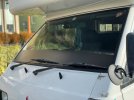
Clayton actually gave me some matte black vinyl to run across the lower section of my windshield. I did this to cover a fixed crack as well as the electronics in the window.
IMG_8547.jpeg
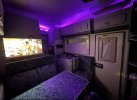
I also installed an LED strip above the cabinets for some mood lighting.

IMG_8548.jpeg
 
Wow thanks for all the info. I have several customers with these L300 campers and they want to get parts. I've yet to meet one though with the capability to identify differences in the parts and clearances for say our downpipe/exhaust. This is based on the body on frame pickup chassis, correct? So the suspension that you have changed, did you just get L300 specific or being capable just put what you figure out works. 2 of our most requested items are our brand new remade l300 4x4 to manufacturing specs leaf packs. Because they are no longer produced by Mitsubishi we decided to take it upon ourselves. And you are correct you can get about 2 inches of lift with the leaves properly arched and running on the stock shackles though we do recommend replacing all the bushings involved. With that said, can you confirm that the rear leaf packs are the same as that are on the 4x4 van? Also if you don't mind and if you have a picture of it up on the lift I would love to be able to see the exhausts and how it runs in the clearance. As well our exhaust is designed to talk up high and it's turbo back but side exit, which I'm pretty confident in everything but the side exit being capable. If you don't mind sharing the information it would be really awesome and appreciate all the documentation so far cheers. If you are still in need of anything for cooling system or otherwise don't hesitate to hit up my shop if you so desire thank you.
 
Wow thanks for all the info. I have several customers with these L300 campers and they want to get parts. I've yet to meet one though with the capability to identify differences in the parts and clearances for say our downpipe/exhaust. This is based on the body on frame pickup chassis, correct? So the suspension that you have changed, did you just get L300 specific or being capable just put what you figure out works. 2 of our most requested items are our brand new remade l300 4x4 to manufacturing specs leaf packs. Because they are no longer produced by Mitsubishi we decided to take it upon ourselves. And you are correct you can get about 2 inches of lift with the leaves properly arched and running on the stock shackles though we do recommend replacing all the bushings involved. With that said, can you confirm that the rear leaf packs are the same as that are on the 4x4 van? Also if you don't mind and if you have a picture of it up on the lift I would love to be able to see the exhausts and how it runs in the clearance. As well our exhaust is designed to talk up high and it's turbo back but side exit, which I'm pretty confident in everything but the side exit being capable. If you don't mind sharing the information it would be really awesome and appreciate all the documentation so far cheers. If you are still in need of anything for cooling system or otherwise don't hesitate to hit up my shop if you so desire thank you.
I actually think you’d be pretty hard pressed to get 2 inches in the rear without new shackles, we tried that first and it needed more springs. Looking at a traditional shackle you can see you need it to taper in to work on these. That was what spurred us looking at the l300 lift kit to see what they’d done. I purchased the bilsteins of the recommendation of Nula who had put them in his jb500. My rear is a little taller because I plan to add a hitch and some weight to the back still and want it to all level out. I’ve guessed a bit on that though. There are plenty of shops in my area that will repack leaf packs cheap though. It seems easier than ordering a model specific.

The exhaust is stock other than the axle back where the original exhaust broke and needed to be replaced. The next time it’s on a lift I can take a picture but not sure when that will be. Maybe in two weeks when I do the ball joints.
 
So it's been a bit of a week trying to get her ready to leave town.

I noticed that my clutch master cylinder had a leak, so it was time to order parts! @stevenlee was able to get me the new master cylinder in just a few days saving me the hassle of ordering the next closest part that was living in the UK.

While the van was in the shop, we went ahead and worked on a few things before I head south:
- Oil change
- Engine Air Filter
- Fuel Filter
- Wiper Blades
- Tightened the alternator and power steering belts
- Clutch Master Cylinder Change/ adjustment
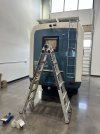
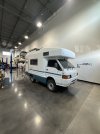
72427070406__9EB5735D-3706-4825-86D3-851A7F811B56.JPEG72427069073__5E71AD56-6E48-484B-904C-624798363C12.JPEG

One of my biggest "fears" (annoyances?) is people knocking on the door, so I installed a doorbell and cameras. I decided to use the Blink outdoor cameras because they claim to have 2 year battery life without hardwiring anything to the van. Running wires for everything has been such a pain so far that this was a no brainer for me. I did the 3 pack of outdoor cameras along with the door bell camera. I also picked up a wired camera for inside the rv. It may be a bit much, but it was easy to install it all. I used the dual lock 3m tape to mount it.
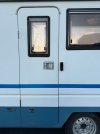
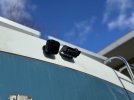
IMG_8832 Large.jpegIMG_8847 Large.jpegIMG_8830 Large.jpeg
Small note, I did install some LED light strips that are powered by a battery instead of being plugged in. We will see how long the battery lasts before I decide to go through the hassle of installing hard wired leds.

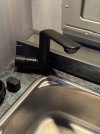
Winter was also upon us and I did not think at all about winterizing the single pump water tank under the sink. My casualty was the faucet I had just installed a few weeks before.

I already ordered a new one though and installed it this week. I also painted the old knob black.
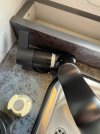
IMG_8930 Large.jpegIMG_9096 Large.jpeg

The final addition, were my arb/ tred pro traction boards. I plan to take this to places that will potentially need them, and having been stuck in sand on an adventure bike before warrants spending the money on these.
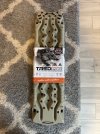
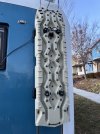
IMG_8592 Large.jpegIMG_9046 Large.jpeg
 
I almost forgot. One other thing I have been planning is to keep clothing storage under the dinette/ main seats. I did a lot of research and decided to use these cotopaxi packing cubes. I can fit 14 t shirts in one of them. pictured here is:

Cube 1: 14 t shirts
Cube 2: 14 pairs of socks, 14 boxer briefs
Cube 3: swimsuit, basketball style shorts, 3 pairs of pants, workout shorts, a belt, dickies shorts

Overall pretty happy with how much these cubes hold and how well they fit in the space.

IMG_9259 Large.jpeg
 
They are both super great people! I’m sure they’d love to meet you!

Clayton actually gave me some matte black vinyl to run across the lower section of my windshield. I did this to cover a fixed crack as well as the electronics in the window.
View attachment 24747
I also installed an LED strip above the cabinets for some mood lighting.

View attachment 24748
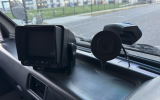
Hey Tanuki, great info! What's the Clarion monitor/tv for? I have one supplied with my JB500 but it wasn't hooked up to anything. First Starlink I've seen that uses "Cat5" cable :)
 
Hey Tanuki, great info! What's the Clarion monitor/tv for? I have one supplied with my JB500 but it wasn't hooked up to anything. First Starlink I've seen that uses "Cat5" cable :)
So that is the backup camera. Strangely though it recently stopped working, not sure if its a fuse or what, but it barely worked anyways with that cctv.

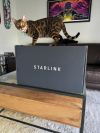
I have only seen that cable for a starlink, Its the one that comes with it.
 
Sorry for my poor humor, the cat in the photo - cat5...oh boy....:). I'll throw the monitor away then, theres another digital screen now. Although the signal isn't coming through recently.
 
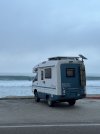
My first somewhat major excursion in the van post modifications took place over the last few weeks. My trip was basically Salt Lake, south through Las Vegas, then a couple of weeks in San Diego before returning home.

I did not do any real off road adventuring on this trip as it was mostly holiday travel, but overall was super happy. I took my boston terrier and my 18 month old bengal cat and surprisingly it went without a hitch.

A few things that I learned:
  • I have enough electrical IF and ONLY IF I do not run the starlink all night. If I go to bed with a 90-100% battery, the starlink will drain it by about 4-5am with no other electronics running. It is really awesome waking up to the charge controller beeping...

  • I can't really comfortably sleep in the upper bed. It is going to take some time to get used to. I spent maybe 4 nights up there before deciding it is not worth climbing up and down to pee in the middle of the night.

  • The Cotopaxi packing cubes were incredible

  • There is still something up with the webasto as the one night I wanted to turn it on, it did not turn on

  • It is time to replace the tail lights. One of the housings has severe rust on it. It looks like its had moisture in there forever and is disintegrating. I changed the bulbs when I got the van, but they are already burnt out so its time for a new housing.

  • Working with Starlink during the day is incredible. I had great connection, and plenty of power when there was sun.
  • Cloudy means no solar power. My house solar power still generates some energy on a cloudy day depending on the solar array, but these panels do almost nothing.

    And some photos:

    IMG_9410.jpegIMG_9770.jpegIMG_9773.jpegIMG_9824.jpegIMG_9870.jpegIMG_9958 Small.jpeg
 
So your electrical is a matter of what you have for batteries. what do you have? Your fixed panel can't be aimed at the brightest part of the sky, I am installing two fixed for 400 watss and 200 portable panel to aim. I bought a 2k genset for the cloudy NW but wont be taking to Baja - guaranteed sun there. My Starlink was agame changer in Baja. Made friends too from everyone wanting to hotspot off it when they saw my antenna :). Your Starlink handles the wind ok up there while travelling? Or do you remove the antenna when on the move? Your middle of the night pee is cured by a urinal - just roll over on your side and whip it in the neck: https://www.amazon.com/Male-Urinal-...1704142245&sprefix=urinal,aps,169&sr=8-6&th=1
 
So your electrical is a matter of what you have for batteries. what do you have? Your fixed panel can't be aimed at the brightest part of the sky, I am installing two fixed for 400 watss and 200 portable panel to aim. I bought a 2k genset for the cloudy NW but wont be taking to Baja - guaranteed sun there. My Starlink was agame changer in Baja. Made friends too from everyone wanting to hotspot off it when they saw my antenna :). Your Starlink handles the wind ok up there while travelling? Or do you remove the antenna when on the move? Your middle of the night pee is cured by a urinal - just roll over on your side and whip it in the neck: https://www.amazon.com/Male-Urinal-Glow-Dark-Bottles/dp/B081S999SP/ref=sr_1_6?crid=11ETXJLI3U6S4&keywords=urinal&qid=1704142245&sprefix=urinal,aps,169&sr=8-6&th=1
Yeah, its just that there's really not enough house battery and nowhere to put more in without a lot of work. I have a 400ah battery and unless I leave the starlink on overnight, OR dont get a good charge during the day (clouds, storms, etc). I have 400 watts on the roof, a 400ah LiFe battery, as well as a 200 watt portable solar with a bluetti. So upgrading power bank may be the option for now espeically during the day when i have to be able to work.

The starlink does fine on the back there, it has done about 1600 miles and only needed a slight tightness adjustment to the clamp becuase it had rotated back maybe 1/4 inch but nothing drastic, I could just tell it moved a little early on so I tightened it more.
 
Top