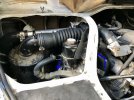
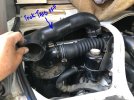
Delica JB500 Camper

The Bosch VE pump can lift fuel vertically about a metre.
If it's less than a metre above the tank, then you have nothing to worry about.
I have nothing to worry about.
On the valve to switch from one tank to another i am think of doing a manual valve since i will only use both tank when needed. No need to carry around 2 tanks of fuel when there are plenty places to get diesel. https://smile.amazon.com/gp/product...4&pd_rd_w=4ZpjF&pd_rd_wg=jb717&ref_=pd_gw_unk
 
Edit: FWIW, these vehicles were designed to be run in third world conditions... you'll probably be all right with just regular maintenance. The fuel filter schedule for european countries (EN590 or equivalent fuel standards) is inspect/drain at 30k, and replace at 60k. The schedule for other countries is replace @ 30k, inspect/drain more frequently.
I am going with this option for now, it is simpler. Thx
 
Here is where the fog lites ended up. Is there a way to turn these into an LED lites? Waiting for the steps to arrive?
 

Attachments

  • 51A4828E-1B85-4BE2-AA05-28716ADF5AB2.jpeg
    51A4828E-1B85-4BE2-AA05-28716ADF5AB2.jpeg
    193.6 KB · Views: 45
Is there a way to turn these into an LED lites?
I wouldn't personally for two reasons. First is the lens pattern is not made to handle that much output, second is that while not completely waterproof, they're pretty sealed. And likely won't disperse heat fast enough to not fry the LED.
 
Here is my 24 x 26 x 7.5 tank going to attach (20 gallons) it will seat exactly the height of the spare tire. I measured the outside diameter of the fuel feed line (.324 inches or 5/16” 8.25mm) and the fuel return line is (.257 inches or 1/4” 6.55mm) my question is what are the inside diameter of these lines? Thx
 

Attachments

  • 5788D0E4-BF1D-4524-82AF-EFE6550352C0.jpeg
    5788D0E4-BF1D-4524-82AF-EFE6550352C0.jpeg
    295.4 KB · Views: 51
my question is what are the inside diameter of these lines?
For the van and truck the ID's are spec'd as 8mm supply and 6mm return.

FWIW, the YHND model is probably the best parts reference for your vehicle... it is the base that the conversion was built on (or very nearly). The link is for the return line at the filter; it's the same ID at the tank.
 
Last edited:
@Growlerbearnz Here is where i ended up with my intercooler install on a JB500. I had to remove an inlet air duck but i don’t think that is gonna make a lot of difference. Also i did not need to fabricate a 90 degree manifold inlet, my manifold inlet did not work but the manifold inlet with the EGR worked without any fabrication. The inter cooler is located on the side of the camper next to the battery under the floor, next to the outside wall of the camper, potentially this wall can be cut out to allow more air to flow. Since i am running the piping to the rear i run the piping inside the air filter well to avoid the exhaust heat, i also wrap the exhaust for extra cooling.

Not sure how this will all work but we are taking it for a couple of week of test ride in central California where the weather is hot. If it all works out I am thinking of adjusting the fuel when we get back.thx
 

Attachments

  • DD334D47-AF3B-4BDA-BCBC-22FF9D930365.jpeg
    DD334D47-AF3B-4BDA-BCBC-22FF9D930365.jpeg
    200.1 KB · Views: 58
  • D83E40E7-38F9-4A8D-B5C4-46F1A88424EA.jpeg
    D83E40E7-38F9-4A8D-B5C4-46F1A88424EA.jpeg
    185.3 KB · Views: 54
  • 4B6C8A4F-BD98-4892-9FDE-4EC07DE25F65.jpeg
    4B6C8A4F-BD98-4892-9FDE-4EC07DE25F65.jpeg
    154.7 KB · Views: 52
  • 49803725-58C1-4B85-AABE-83A6BC7C178F.jpeg
    49803725-58C1-4B85-AABE-83A6BC7C178F.jpeg
    191 KB · Views: 48
  • 6B7873E3-8054-43B3-A20E-3882F05F2C53.jpeg
    6B7873E3-8054-43B3-A20E-3882F05F2C53.jpeg
    129.7 KB · Views: 51
  • 003045BE-84A7-4D71-8A12-641F00E0B95F.jpeg
    003045BE-84A7-4D71-8A12-641F00E0B95F.jpeg
    143.6 KB · Views: 50
  • C14B46BD-0C63-4D4D-9DBE-D0B42909F3B4.jpeg
    C14B46BD-0C63-4D4D-9DBE-D0B42909F3B4.jpeg
    168.2 KB · Views: 51
  • A1618775-049A-431B-AC73-FF90CAFA6A22.jpeg
    A1618775-049A-431B-AC73-FF90CAFA6A22.jpeg
    94.9 KB · Views: 58
That looks pretty sweet! A nice compact install. The duct you removed shouldn't matter.

One thing though, you need spring washers under all those nuts. Without spring washers your nuts will fall off, usually at the most inconvenient time.

nut-rusty-bolt-lock-washer-260nw-1477113308.jpg
 
Last edited:
FYI @Growlerbearnz it turn out that the blanking plate of the inlet manifold is on the way when installing the cowlings (panel) I think a 90 degree like the one you had will do it. I will address this when i get back from my trip leaving today. I plan to cut the inlet manifold and use the flange only then tig weld a 1.5” tub on it. Unless i can find a machine shop to make me a flange then tig weld a 1.5“ tube on it. Everything else on the IC is connected including the IC fan. Hopefully this is a quick fix when i get back. Thx

I will be testing out my aluminum radiator with a fan. Also if there is a change in the ride due to the bumper and spare tire installed in the front.
 
Instead of making an all metal 90 degree inlet stub like I did, consider making a short straight stub (just enough to hold a hose clamp) and using a 90 degree silicone hose. My inlet stub made it difficult to get at the studs.


PXL_20210721_222514083.jpg

I will be testing out my aluminum radiator with a fan. Also if there is a change in the ride due to the bumper and spare tire installed in the front.
You're keeping the engine-driven fan, right? Not relying purely on an electric fan. An electric fan helps at low speed, but you need the engine driven fan for highway speeds.
 
Instead of making an all metal 90 degree inlet stub like I did, consider making a short straight stub (just enough to hold a hose clamp) and using a 90 degree silicone hose. My inlet stub made it difficult to get at the studs.


View attachment 12948


You're keeping the engine-driven fan, right? Not relying purely on an electric fan. An electric fan helps at low speed, but you need the engine driven fan for highway speeds.
Yes a short inlet stub, Yes I kept my engine fan. it was hot today I turn my AC on,12psi boost most of the time, with short bust of 14 psi on hills and manually turned on my radiator fan, i cannot hear the fan inside the cabin, it helped. I think the IC will help when I get it going.thx
 
Instead of making an all metal 90 degree inlet stub like I did, consider making a short straight stub (just enough to hold a hose clamp) and using a 90 degree silicone hose. My inlet stub made it difficult to get at the studs.
@Growlerbearnz sorted out my IC clearance issue with a straight stub as you suggested. See pictures Tested it out for leak, sprayed soap water on all the joints no leaks. I cut the inlet and just used flange i then took it to a tig welder to weld 1.5 aluminum tube. The last picture is the clearance between the paneling and the 90 degree host. The 2 IC fan blows air to the IC like a hurricane. Taking it out for a test ride tomm. I will be reading up on turning up the fuel i know there is a write up on the forum about that. I need to work up the courage to turn that fuel screw up

FYI the fan on the aluminum radiator worked great, just got back from 2 weeks of traveling central and coastal areas of California. The fan turns on at 185F and turns off at 165F. It does it’s job to keep the engine from overheating. Constanly on 12psi boost and AC on in many parts of the trip. Thx

@sk66 The next thing i will be sorting out is my second fuel tank. Thx
 

Attachments

  • D888C19B-BF9A-479C-BFB9-17A5350399F8.jpeg
    D888C19B-BF9A-479C-BFB9-17A5350399F8.jpeg
    203.7 KB · Views: 24
  • 91C93083-E932-41F7-A397-3104E07514FF.jpeg
    91C93083-E932-41F7-A397-3104E07514FF.jpeg
    187.2 KB · Views: 23
  • 66A0537D-9EE8-4028-8B79-52834F5DB6F4.jpeg
    66A0537D-9EE8-4028-8B79-52834F5DB6F4.jpeg
    173 KB · Views: 25
  • CCBD311D-63AA-46E9-A139-3929455BFBAF.jpeg
    CCBD311D-63AA-46E9-A139-3929455BFBAF.jpeg
    181.8 KB · Views: 25
One thing though, you need spring washers under all those nuts. Without spring washers they *will* come loose, usually at the most inconvenient time.
Something I learned not all that long ago; lock washers do nothing until after the clamping force is already loosened notably. They may prevent complete loosening/loss, but only if they are harder than the other materials/surfaces (where they bite-in and remove/gouge metal).

“The typical helical spring washer … serves as a spring while the bolt is being tightened. However, the washer is normally flat by the time the bolt is fully torqued. At this time it is equivalent to a solid flat washer, and its locking ability is nonexistent. In summary, a lockwasher of this type is useless for locking.”

- NASA Reference Publication 1228 (1990) “Fastener Design Manual”
 
Fair enough!

They may prevent complete loosening/loss, but only if they are harder than the other materials/surfaces (where they bite-in and remove/gouge metal).

It's that backup function I was thinking of, but that's not what I wrote. Comment edited: "Without spring washers your nuts will fall off, usually at the most inconvenient time."
 
I took it out for a test drive with the newly installed intercooler, I think it has more power, I can also hear the turbo whining through the tail pipe that goes out to the side of my rig, I could not hear the turbo before. I think i will drive it around like this for a while before i decide on adjusting the fuel. In addition to a bit more power reliability is also important to me. thx
 
Here is what i sorted out and sourced on the second tank,
-a 17 gallon tank from Tank Inc instead of a custom made tank, I found this tank that will work, https://www.tanksinc.com/index.cfm/...t_id=130/category_id=133/mode=prod/prd130.htm with a sending unit also from Tank Inc https://www.tanksinc.com/index.cfm/...t_id=700/category_id=133/mode=prod/prd700.htm
- ACDelco U7001 professional fuel tank selector https://www.tanksinc.com/index.cfm/...t_id=700/category_id=133/mode=prod/prd700.htm
- Dorman diesel fuel filler neck https://smile.amazon.com/gp/product/B009XR1SH0/ref=ppx_yo_dt_b_asin_title_o00_s00?ie=UTF8&psc=1
- Fuel gauge https://www.summitracing.com/parts/NVU-40131-01
The tank will be separate and installed under the OEM tank where the spare tire use to be located. I have relocated the spare on on the front of the cab. I will be able to switch from between the two tanks using the ACDelco U7001from the cab, I originally planned for a manual switch between the two tanks for simplicity but after our recent trip I decided it is not convenient. If all the sourced parts arrive on time the tank should be installed and functional by mid Sept. I welcome you suggestions and comments. thx
 
Last edited:
Top