D4BF Engine Swap

ccmickelson

Well-Known Member
Picking up from this thread: http://delicaforum.com/index.php?threads/purchasing-a-new-engine.675/ , I'm finally getting around to beginning the install of the new D4BF engine I imported this past winter directly from Hyundai.

Last night I finally un-crated the beast with the help of a 1-ton cherry picker lift I got at Harbor Freight for about $150 with some kind of random discount the guy at the checkout generously gave me.
IMG_7485.JPG
The lift was easy to assemble and, in my opinion, is a great value for the money. My littlest one, Lucy, gave me a hand.
IMG_7486.JPG

After assembling the lift we tore the sides of the crate off and lifted the engine off the crate bottom.

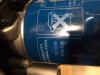
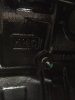
Behold, the mighty 4DBF...
IMG_7512.JPG

IMG_7503.JPG

IMG_7505.JPG

IMG_7506.JPG

The engine came with a sturdy, welded steel stand that supports the engine at the sump flange and is very stable. I set it on a dolly for ease of maneuvering it in my small shed. The space I have to work in is very limited and it will be a trick to get the job done.

IMG_7513.JPG

I have a fair amount of mechanical ability and have done engine removal and installations on air and water cooled VW's as well as most of the wrenching on my BMW airhead motorcycles over the past 30 years or so. I have read through Growlerbearnz's excellent 4DBF Engine Install thread, here: http://delicaforum.com/index.php?threads/hyundai-d4bf-info-and-installation-guide.1137/ several times. I must admit the injection pump linkage swap has me the most intimidated. The engine is complete (I even ordered a new starter motor and cooling fan) but in addition, I have also ordered a number of new parts for the install, including engine mounts and coolant hoses. I have also spoken with Kellyn at Karr Automotive about ordering up a remanufactured Denso A/C compressor and associated parts. If there are any other parts that come to mind for this job, please don't hesitate to let me know!

Last night, I spent some time getting familiar with the "landscape" of this new engine and how it is laid out relative to the 4D56. One curious thing I noted was a bit of mineral oil residue on the lower part of the turbo/exhaust side of the engine, particularly under the EGR. Hoping there is not a leak somewhere.

The next major step is to strategically position the Delica in the carport adjacent to the shed door and begin the process of removal of the old engine.

Exciting stuff.
 
Last edited by a moderator:
Excited to see this unfold! Curious on the cost of the motor, if you don’t want to disclose understood, or if you’d like to private message me...my curiosity is peaked.
 
Today’s update...

Spent an inordinate amount of time removing the passenger side door because I couldn't figure out how to unplug the harness. The workshop manual downloads here showed a plug on the other side of the door jamb. However, after extensive searching and removing the front driving light/turn signal lens I pulled the door panel off and disconnected the harness from three points being the auto door lock, auto window motor and panel light, then pulled the harness through the rubber grommet on the edge of the door.
IMG_7522.JPG

IMG_7523.JPG

Even with this door trim fastener removal tool I still managed to break one.
IMG_7524.JPG

IMG_7525.JPG

IMG_7528.JPG

Next up was removing the passenger seat and center console which is all one unit. First I unplugged the harness to the power window switches which is just under the rear of the center console and was accessible after removing the two phillips head screws holding the tray of the console down, then removed the 4 12mm bolts holding the hinges and removed the entire assembly to the rear of the van.
IMG_7529.JPG

IMG_7533.JPG

Once all of that was out of the way I decided to do a trial run of the engine lift to get an idea of how it would fit and negotiate the limited space around it. The firs thing I discovered was that the front wheel did not allow the boom on the lift anywhere near close enough to the engine.
IMG_7534.JPG

IMG_7535.JPG

So, the wheel must come off to allow for a closer reach. However, even with the lift as close as I could manage it, the end of the boom still did not fall between the two engine lift loops. It is maybe 1/3 of the way between them. I am now wondering how much this matters or if I should have gotten the larger 2 ton lift that has another 15" of boom reach. I certainly do not want to drag the engine out from the engine bay. My neighbor does have some sort of centering device that he says will help, but I'm wondering if this device will take up more precious vertical space.

IMG_7537.JPG

That's all I accomplished today aside from spending more time getting familiar with the new engine. Tomorrow I will try to figure out the best position for the van in the carport before beginning the engine dismantling.
 
One of you asked about the turbo so I thought I'd post more pics of that as well as a lot of closeup images of the engine.

The new turbo is both oil and water cooled.
IMG_7541.JPG

IMG_7542.JPG

IMG_7544.JPG

Here is the outer banjo-bolt connection for the turbo water cooling.
IMG_7577.JPG

And the inner water cooling plumbing is just visible between these two intake ducts.
IMG_7578.JPG

Waste gate actuator adjuster looks very well designed.

IMG_7580.JPG

The oil feed to the turbo now taps into the head just below the intake rather than the block. EDIT: THIS IS ACTUALLY NOT TRUE AND I HAVE NO IDEA WHY I THOUGHT THAT INITIALLY!!!!
IMG_7583.JPG

IMG_7585.JPG

IMG_7588.JPG
 
Last edited:
One other mod I intend to do while the engine is out is install a block heater into one of the frost plugs.
IMG_7550.JPG

Somewhere I read that the recommended spot was just above the starter motor to the rear of the block. Would appreciate any opinions on this.

IMG_7552.JPG

Engine block number.
IMG_7554.JPG

Injection pump.
IMG_7556.JPG

11 volt glow plugs. Growlerbearnz says they will not work so they will be changed.
IMG_7562.JPG

New starter motor.

IMG_7566.JPG

IMG_7567.JPG

IMG_7571.JPG
 

Attachments

  • IMG_7547.JPG
    IMG_7547.JPG
    91.3 KB · Views: 17
  • IMG_7549.JPG
    IMG_7549.JPG
    43.2 KB · Views: 17
IMG_7593.JPG

IMG_7595.JPG

IMG_7599.JPG

Current position of oil dipstick.
IMG_7602.JPG

And I believe the upper position where it needs to be relocated.
IMG_7605.JPG

Clutch pack will go away.
IMG_7612.JPG

Injection pump linkages will be exchanged.
IMG_7613.JPG

IMG_7614.JPG

IMG_7617.JPG

It's hard not to be impressed by the quality of workmanship and the thoughtful, purposeful improvements made in this engine. Kia/Hyundai have long impressed me with the quality and value of their automobiles so I guess it shouldn't be too surprising.
 
Last edited:
Looks like you're making progress! The door wiring plugs are behind the glove box- if you remove the glovebox you can get at them with difficulty. Removing the wiring from the door is probably just as easy.

The chain on the engine crane will need to be much shorter than you have it, here's how mine ended up and I only had an inch of clearance to get it out the door aperture.
Crane.png

I think the hook really needs to be above the rocker cover, if it's off to the side the engine will be unbalanced and will tilt sideways when you lift it, which might make removing it difficult. Maybe have some short pieces of wood ready to stop the engine hitting the side of the engine bay.
 
Looks like you're making progress! The door wiring plugs are behind the glove box- if you remove the glovebox you can get at them with difficulty. Removing the wiring from the door is probably just as easy.

The chain on the engine crane will need to be much shorter than you have it, here's how mine ended up and I only had an inch of clearance to get it out the door aperture.
View attachment 2520

I think the hook really needs to be above the rocker cover, if it's off to the side the engine will be unbalanced and will tilt sideways when you lift it, which might make removing it difficult. Maybe have some short pieces of wood ready to stop the engine hitting the side of the engine bay.

I think you're right. I called HF and they will let me exchange the 1 ton for a 2 ton which has more than a foot and a half longer boom reach. And yes, I will shorten the chain on the boom as you suggest. Thanks, Growlerbearnz.
 
Not a lot accomplished today, but thanks to Harbor Freight accepting an exchange, I was able to rectify the lift issue and brought home the 2-ton version with a much longer boom reach.
While assembling the lift I came to the realization that the support straps on this lift missed the mark by about an inch, but there was no way I was going return a second lift after having assembled most of it, so I just drilled some new holes, first making a pilot hole, then used a step bit and thread cutting oil to enlarge it for the through-bolt.

IMG_7632.JPG
There was also one bolt missing for the casters but I had one laying around. When I exchanged the lifts at HF, one of the first boxes they brought out was missing half the parts. I definitely recommend checking through the boxes before leaving the store if you find yourself needing one of these.

IMG_7624.JPG

IMG_7625.JPG
The leg width barely makes it through the shed door but now the boom easily reaches the center of the rocker cover as Growlerbearnz recommended.
IMG_7626.JPG
With the boom just clearing the top of the door jamb I measured 27 1/2" to the inside curve of the hook with 2 links of chain above it. I measured the height of the new engine at around 25 1/2", so I will definitely need to remove one or both of the links as the chain hooked to the engine will take up another 3 or 4". Like Growlerbearnz pointed out in his install thread, it's definitely going to be tight.
IMG_7631.JPG

Now that the lift is sorted and I have a general idea of the logistics and space required to remove and install the engines I will position the van as strategically as I can and begin the steps for removing the old engine sometime this weekend.

Just a side note: When first looking over the new engine I noticed there was mineral oil on the lower engine block and was concerned there was a leak somewhere. But last night I realized the entire engine has a very light coating of mineral oil. I assume this was sprayed on to prevent corrosion during it's voyage across the Pacific from Korea.
 
I definitely recommend checking through the boxes before leaving the store if you find yourself needing one of these.

First time shopping at Harbor Freight, then? ;-)

I've had a thought regarding the chain length: rather than cutting links off the chain, could you feed the chain through the open end of the boom? Completely ignore the little slot the chain is supposed to mount through, have the hook dangling out the end of the boom. That'll give you a little more reach, and might make the hook closer to the boom without having to cut the chain.

IMG_20190602_095941.jpg
 
I've had a thought regarding the chain length: rather than cutting links off the chain, could you feed the chain through the open end of the boom?
I would expect the end of the box tubing to deform badly loaded in that manner; it looks to be pretty thin walled. I think I would just replace the existing hook/chain with a 2ton swivel hook (might need to enlarge the slot a bit to get the buckle through).
 
I would expect the end of the box tubing to deform badly loaded in that manner; it looks to be pretty thin walled. I think I would just replace the existing hook/chain with a 2ton swivel hook (might need to enlarge the slot a bit to get the buckle through).

This was my concern as well. We ended up leaving it with bolt through last link and it came out fine, but with nary a hair of space to spare. More to follow with pics.
 
Top