Rear DELICA light fix

Did mine tonight using the bulbs mentioned here, love the results. Looks more intentional rather than the ghostly...head scratch...is that lit up?, look.

I thought I’d share some insights I made along the way that may help. A lot of it is self explanatory which is probably why the OP didn’t mention, but I’m sitting in the shop having a beer and calming my mind before sleep so why not.

I didn’t need to remove the panel entirely, just the bottom row of plastic retainers and the sides. You don’t need a whole lot of room to get a stubby screwdriver in there and remove the one screw holding the bulb in.EACAA11E-03BF-4748-868D-B26C6F2972D5.jpeg1155B4D9-DA96-43DC-A880-24E7E06E4E2E.jpeg53598987-7923-486C-8F1B-E0808C1BBB3A.jpegAF202D11-7DCA-4033-95BF-3F7F88360067.jpeg3CEE4EAA-A8AD-48BD-9D99-985DA763E5DE.jpeg6344940E-BC17-45AB-A4B9-BE6F57A8B49F.jpeg9FCD2238-95EB-43B4-9038-DE4C728CE7D9.jpeg75159522-0AB3-4AEF-83AB-A25F79E79ECC.jpeg4CFCCBBE-A6DF-443B-8B6D-76E9DA6C72EB.jpeg
 
Anyone know where to get the rear conical housing? And possibly the fiber strands? Can't find part number on partsouq. Mine are all rusted out and I'm not sure light will make it through the fiber stands due rust seeping to the strands.
 
There is a post on the MDOC Facebook page. Someone opened up the panel and installed 12v EL tape behind the letters. Looks awesome!View attachment 2440
Well, to revive this thread on this...

While replacing the ignition and locks on my Delica, I had to remove the rear garnish and since I had already bought the EL tape to do this mod last year, I thought... why not?

So, I popped the garnish off (with a bunch of swearing and breaking clips) and then started to see how to completely disassemble it to put in the EL. But, once I clipped off the melted plastic tabs holding the fiber lit part to the main part...
garnish-EL - 1.jpeg
garnish-EL - 2.jpeg

I don't see an "easy way" to get past the plastic since it looks glued and tabbed... (some close ups of the tabs)
From the front looking at the black plastic tab that clips into the tan plastic back plate​
garnish-EL - 3.jpeg
And the back of the tan plastic back plate where the tab clips in....​
garnish-EL - 4.jpeg
Now what? Heat it to loosen the plastic? Is it "glued" by dirt and debris, so do an overnight bathtub soak? Grind down the plastic to just split the fiber away?
 
AA9A9881-2D70-4620-B785-AE1E7D84CC30.jpeg54EBFA1C-23F2-4285-8A97-BCA94067989B.jpeg@sck_nogas use a dremel tool to do surgery and then you will have space to slide in your electroluminescent strips in. I spent weeks attempting everything else but breakage was unavoidable, so I decided that cutting into the backing was the least intrusive, it was 8DAF0050-CDD8-42C0-B961-6B82ABBC1CE9.jpeg
 
@sck_nogas use a dremel tool to do surgery and then you will have space to slide in your electroluminescent strips in. I spent weeks attempting everything else but breakage was unavoidable, so I decided that cutting into the backing was the least intrusive, it was
Just heard from the guy on Facebook who did it a different way....
It is glued and the tabs also hold it. A adjustable heat gun. Paint mixing sticks and a small flathead screw driver or pry tool are needed. Heat the glue on one end and pry up a corner. Once you can slide the paint stick through you heat the next section and slide the stick toward the freshly heated glue. The glue is SUPER sticky try not to let it reconnect. I took all the glue out once separated.​

So, will first try the heat and pry method. Then if I get too frustrated, will try the dremel grind and cut option, I'm just too afraid to go to deep with the Dremel.
 
So, will first try the heat and pry method. Then if I get too frustrated, will try the dremel grind and cut option, I'm just too afraid to go to deep with the Dremel.
The heat and pry method worked well!
5BB86048-E1D2-4CDC-9F83-4D0867F73294.jpegI got the letters free quite easily.
820243EE-22EF-46C0-9711-E6E0A1E2BEB6.jpegand did not do too much damage (cracked a little cuz I did not heat long enough. )
0640C4E8-25A0-4683-A6D6-F46CF7980FD0.jpeg
But damn, that glue is everywhere!!! It’s sticky and a royal pain!!!
F1DC81AC-D29E-4BEA-A31B-D60E7528916B.jpeg
I now have spare fiber optic and lamps if anyone wants/needs. Let me know they are yours for price of shipping.

Have a quick look of the lit version before I re-assemble it in plastic (using clear silicone) and install it.
delica - 1.jpeg
 
Last edited:
That project is on my to-do list.
Just thinking... someone is following me up a hill at 40MPH. Then they see the "DELICA" lit up...
Saying to themselves "no wonder were going so slow", it's a Delica.
 
Final report...
View attachment 7564

I used clear silicone to seal the pieces together, and clamped it while it dried.

I then replaced the old brittle black gasket seal with some new door seal edge guard for $9

I also replaced the old crusty moisture barrier that had been taped up 300-400 times and put in new butyl sealant.

So, my tail gate is DONE!
View attachment 7566
Close up!
View attachment 7565
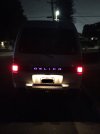
Have you had any issues with the power supply for the EL strips? I’ve gone through 2 pair of them. They seem to burn out after 3-6 months.
 
I used this video

and ordered these lights 18mm length.
pack of 10 yellow LED lights $16
https://www.amazon.com/gp/product/B018G5MY5O/ref=ppx_yo_dt_b_asin_title_o03_s00?ie=UTF8&psc=1

I ended up selecting the BLUE LED lights.
I think they look nice.

The specs on amazon say width is 6mm, but that is completely wrong.
They are 10mm or really probably 3/8".
I had to carefully drill the hole in the plastic holder to 3/8" which was slightly larger.
Attempted to just screw it in without drilling did not turn out well.

After that, the lens sticks out too far. In the youtube video, he spends some effort grinding
down the base of the LED light crown itself. I tried with my dremel on a test light, but it was
very slow going, and was a pain, hard to control and slow to cut the metal away. So I abandoned
that plan and tried something else. After cutting the wires and soldering them, used some shrink-wrap,
although the wires are so short that there was not a lot of space. After trying it in the van,
I realized that it did not fit right as it was, but grinding was too hard, so instead on
one side I tried popping off the cheap plastic lens that comes with it, which then makes it the perfect height.
I wanted to know if that lens actually is needed and matters, so as a test,
on the other side, I temporarily installed it with the lens, but removing that small square protective piece
of glass. One side had no lens and one side had the little glass square removed.
They were equally bright. So the lens was not needed at all, and it even fits better without it,
and I still have those original little glass squares which may protect the ends of the fiber optic cables.
I think the blue came out really nice, even if it is a little purple, it is a nice color.

New Delica L300 Logo with blue LED lights.JPG
 
Last edited:
All the info in this thread is awesome. My 96 Active World seems to have the wiring harness and connector, but not the light housing and housing-side of the connector (I wonder if it was just removed or it never came with the Active Worlds). Anyone know where I can pick up a set or any alternative methods that do not use the light housing? The EL lights look sweet, but I am not certain I have the tools/skill to pull the center garnish apart.
 
Top