What Did You Do for Your Van Today?

Manual hubs are more reliable when you actually need them and don't unlock at all in reverse, unlike autos that might unlock momentarily then lock back in. I changed mine because my originals were always locked, which rotated my front shafts all the time creating more rolling resistance and cv boot wear, so I changed to manual hubs, slightly better gas mileage and no cv joint shaft rotation.
 
I went out with the intention of mounting my new license plates, only to find the batteries too depleted to start the van. Dang. 11.7 volts. Enough to crank slowly for a few seconds but not enough to start. Poked around and found the sketchy 1990s era turbo timer was flashing an error light and refused to turn off. I think I found my parasitic draw. Unplugged it and got my neighbor to jumpstart me with his killer RHD 1990s era diesel land cruiser. Went for an hour drive to charge the batteries, then came home and ordered up a Li-Ion jumpstart box from Amazon. Oh yeah, then I installed my plates. Fun to have a vehicle I can break, diagnose, and wrench on again!
 
Finished off the slat bench/bed yesterday!

IMG-3784.jpg

IMG-3783.jpg
 
Do you guys know if the OE shocks are a gas charged or not?

Pulled one out, was checking measurements and it did not return to full extension.
 
My low mileage OE front shocks that I just replaced with Bilstiens seemed like they were still good did not return to full extension when I took them off either.
 
Well, the past few days were a bit hectic and busy. After some delays, I got my dual core radiator and side exhaust from DelicaWorks
28152817

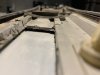
So, Thursday evening after work I started on the project list... flush coolant system, take out radiator, replace alternator boot, install new radiator, fill with new coolant, bleed air out of coolant system, weld on slanted bung to new exhaust, and then replace side exhaust. Not bad for the remaining 4 1/2 hours of daylight... :)
281828192820
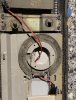
This is where things went wrong and I stopped taking pictures... Call it fate... So, the new radiator has the automatic transmission connections, but the old radiator had straight pipes, and the new one has bent ones. No biggie. Evan says the long one should go there, but the hose don't reach it... Swap the pipes (since they screw on) and... with a little patience, it fits! Phew... I fill and bleed the new radiator, and let's see how much time I have left... Oh geez. It's already past 9pm, and then sun is set. Do I have enough time to drill the hole in the exhaust for the AFR sensor, weld on the bung, weld on the bracket, take off the old exhaust, hang the new exhaust, clean up the driveway, and get to bed before I leave IN THE DELICA at 8am to drive into the mountains? NOPE! Okay, let's clean up and call it a night.

So, with just the new dual core radiator I put the windows down and start the drive from San Diego up I-15/215 to US-395, to Big Pine and then up CA-168 into the White Mountain range. Going up the El Cajon Pass on I-15, things look MUCH cooler... Hopes are holding high for my upcoming trip to Colorado...
2821
That's at a sustained 53-55 mph speed during the whole grade. Max temperature on the radiator reached 215F at the top of the pass.

Headed up US-395 in low 90s weather at 65-70mph going up hills (slower), but pushing hard to get there quick. Met up with friends at Lone Pine, and then drove up to Big Pine to make the right onto CA-168...

Let's set the scene. The current temperature in the radiator is 220F, I've been driving hard for the past 5 hours (heat soak is at 100%), temperature is 95F, and I'm at 4,000ft elevation already... I have 9 miles of continuous 8% grade on a winding road to go up to my first turn at 7,400 ft of elevation, so heater goes on full. Needless to say, I had to pull over quickly. I ended up having my passenger ride in the other vehicle, and I opened the engine compartment with my windows down. Got up to 7,400ft for the turn and then made the right and continued up to Schulmann grove where the max temperature reached 246F, but I had to stop once at just below 10,000ft to let the temperature drop a bit. After a few minutes of cooling back down to 220F, we continued on the dirt road, now in 4WD, and after a few miles I HAD to close the engine hatch. Either heat goes out or dust comes in.

So, I reach the trail head at a new high temperature record...
28222823

Set up camp just at sunset, I camped in the Delica, next morning we did our hike to the summit and I made it. However, the next morning was fun, since the glow plugs weren't glowing, so used jumper cables to bypass the "super-glow" system to get it started.
2825
Rolled down the hills and saw some amazing scenery.
2826

Have a trip with the GF and her kids to Colorado in a few days, but with the overheating, (oh and the AC isn't working...) I can't see my Delica being able to make a 2,000 mile (with 55,000 ft of elevation gain) currently. I still have more work on dialing this in. Or keeping my speed/temperature down. So, on to plan B. :)

Will be putting on the side exhaust and that should help some, but I need to check and see if all of my cooling systems are working (fans/lines/etc).

More will be revealed!
 
Where's 215*/255* on the stock gauge?
On my drive back through the mountains (PA/NY) I hit a little over 3/4 and was getting a bit concerned.
Well... The stock gauge varies, that's why I put in the multi-gauge.

So, for my Delica, the dash temperature gauge to multi-gauge is...
  • <200F = <1/8
  • 201-205 = 1/4 (aka 2/8)
  • 206-213 = 3/8 (this was as I was going up the El Cajon grade in the picture at 210F)
  • 214-225 = 1/2 (aka 4/8)
  • 226-255 = 5/8 (Seriously, it never seemed to go any higher)
I have gotten my gauge to 3/4 but that's when I really over heated previously and got to the ever fun diesel self ignition temperature... :(

So, previously with the old radiator I sat at 1/2 most of the time. Now with the new radiator, I sit at 3/8s.
 
What you're calling 3/8 I would call 1/4 above min.; and it's where I normally sit. I understand the two lines above "C" and below "H" as the "normal/acceptable range" which I judge my temp against. I was considering the upgraded radiator, but based on your description I don't see a notable improvement potential.
 
Yikes! 255F is about as hot as you ever want the coolant to get, 50% Glycol mix at 11psi boils at around 258F. Where is your coolant temperature sender located? In the cylinder head outlet in place of the AC cutout switch, I recall?

The stock gauge should have been freaking out at that point. I'd be interested to know what temperature the radiator was, my radiator top tank never goes above 190F.

Either there's still a problem with your cooling system (fan clutch, high air temps, thermostat not opening enough?) or you've discovered the limit of the engine's cooling ability- it's possible that above a certain load it just can't circulate enough coolant to stay cool. I've never found that, and I haul 4000kg/9000lb fairly often, but who knows.
 
Last edited:
Yikes! 255F is about as hot as you ever want the coolant to get, 50% Glycol mix at 11psi boils at around 258F. Where is your coolant temperature sender located? In the cylinder head outlet in place of the AC cutout switch, I recall?

The stock gauge should have been freaking out at that point. I'd be interested to know what temperature the radiator was, my radiator top tank never goes above 190F.

Either there's still a problem with your cooling system (fan clutch, high air temps, thermostat not opening enough?) or you've discovered the limit of the engine's cooling ability- it's possible that above a certain load it just can't circulate enough coolant to stay cool. I've never found that, and I haul 4000kg/9000lb fairly often, but who knows.

Yeah, was seriously worried at 252F. That was the temperature that I reached as I was trying to cool the engine when I was stopped at 11,200 ft just about 100 ft from the top of the hill. Was thinking, if I could coast downhill, I'd cool faster and get more air, but at 252F I stopped, and even with the fan spinning the temperature climbed 3 more degrees to 255F

Yes, the temperature for the multi-gauge is measured from the AC cutoff switch position. As for cooling system issues to work on next, I'm leaning towards getting a higher flow thermostat. As the engine is only 3 years old, I'm doubtful that the fan clutch is bad, as I can see the fan spinning. Maybe the fan blades on the D4BF and 4D56 are different, blade count/angles to pull more air through?
 
Mine didn't come with a fan, so I have the original 4D56 fan anyway. I'm wondering how restrictive that new low temp thermostat is- maybe it just doesn't open as far as the Hyundai one. I mean, sure, it opens earlier, but if it flows less when fully open you're going to be in trouble. I really *really* hope that's it.
 
Oh! For today's amusement I installed the world's most adorable solar panel:

2843

30W to keep the batteries topped up when it's not being used (quiescent current is 105mA. Too many electronic toys!)

...and I've just noticed that I've parked it so the panel is precisely in the shade of the one tree. Typical.
 
Last edited:
I DID IT!!!! My NON-LIT DELICA on the rear hatch has been DRIVING ME CRAZY!! I was so envious of those of you that have the DELICA letters that illuminate, I decided to risk destroying the whole rear hatch “reflector”.
I saw a guy on FB that had done it without giving any hints to how it was done. Here you go. I am not sure the about the sequence of the photos uploaded, but everyone on here seems intelligent enough to get the gist. And as always, I usually respond to any questions fairly quickly.
When Popped off the reflector, I did use a plastic rivet tool for removing door panels to get behind it without having to fleet the 25+year old plastic too much. It is fairly straight forward to actually remove. When you remove the interior door panel for the hatch you can see most of the pop rivets from the back. Pushing on them did help me get them out. I did have to do a couple minor repairs to strengthen the metal attach points at each end of the reflector. But nothing “broke” in its removal. Once off, I was able to remove the letters from the red cover, but the old plastics had welded together so I couldn’t remove the grey backing from the letters. As mine was not equipped with the OEM light up letters, I figured it was possibly glued. Then the decision was to cut into one side to see what I was dealing with underneath. Ever so carefully I cut out the 2 strips of plastic covering the rear of the letters with a dremel and cutting disc. You can see there is an opaque white plastic sheet the makes the letters glow what it’s held up to the light. From where I attached these 1.5inch X 12 inch electroluminescent strips I got on amazon for under $20 behind the lettering and BAM! It’s LIT. I wired them into the factory harness for the OEM system which had two plugs just waiting to be powered just for this. Again, lmk if anyone has questions. I was able to do this with no damage to the reflector, but there was a few tense moments.
 

Attachments

  • 8D144902-83A5-42B5-9BB9-0D75D8F8533A.jpeg
    8D144902-83A5-42B5-9BB9-0D75D8F8533A.jpeg
    942.1 KB · Views: 69
  • 349E5CB0-6E73-4FFF-8718-7C6635860763.jpeg
    349E5CB0-6E73-4FFF-8718-7C6635860763.jpeg
    442 KB · Views: 63
  • FE26DC98-62FB-41C1-B57B-AD84F8525D39.jpeg
    FE26DC98-62FB-41C1-B57B-AD84F8525D39.jpeg
    756.6 KB · Views: 57
  • 30A4DF96-E379-48A2-9AC9-89DC9FA18F04.jpeg
    30A4DF96-E379-48A2-9AC9-89DC9FA18F04.jpeg
    750.1 KB · Views: 57
  • 57AA1B01-E852-4433-9D88-F96BFB0B61A6.jpeg
    57AA1B01-E852-4433-9D88-F96BFB0B61A6.jpeg
    814.2 KB · Views: 62
  • 2FC550F5-E6B9-431D-8E6B-1B2013AF61B4.jpeg
    2FC550F5-E6B9-431D-8E6B-1B2013AF61B4.jpeg
    894.7 KB · Views: 63
  • 50DBBC1C-70FE-4035-83ED-3D0B3AF466C8.jpeg
    50DBBC1C-70FE-4035-83ED-3D0B3AF466C8.jpeg
    405 KB · Views: 65
Top